
Even though Cisco equipment is very capable, it tends to become End-of-Life before you can say “planned obsolescence”. Websites become bigger, bandwidths increase, and as a side effect of those “improvements”, routers, firewalls, and in this case, intrusion prevention systems get old quicker and quicker.
Apparently, this was also the case for the Cisco IDS-4215 Intrusion Detection Sensor that I was given a few months ago.
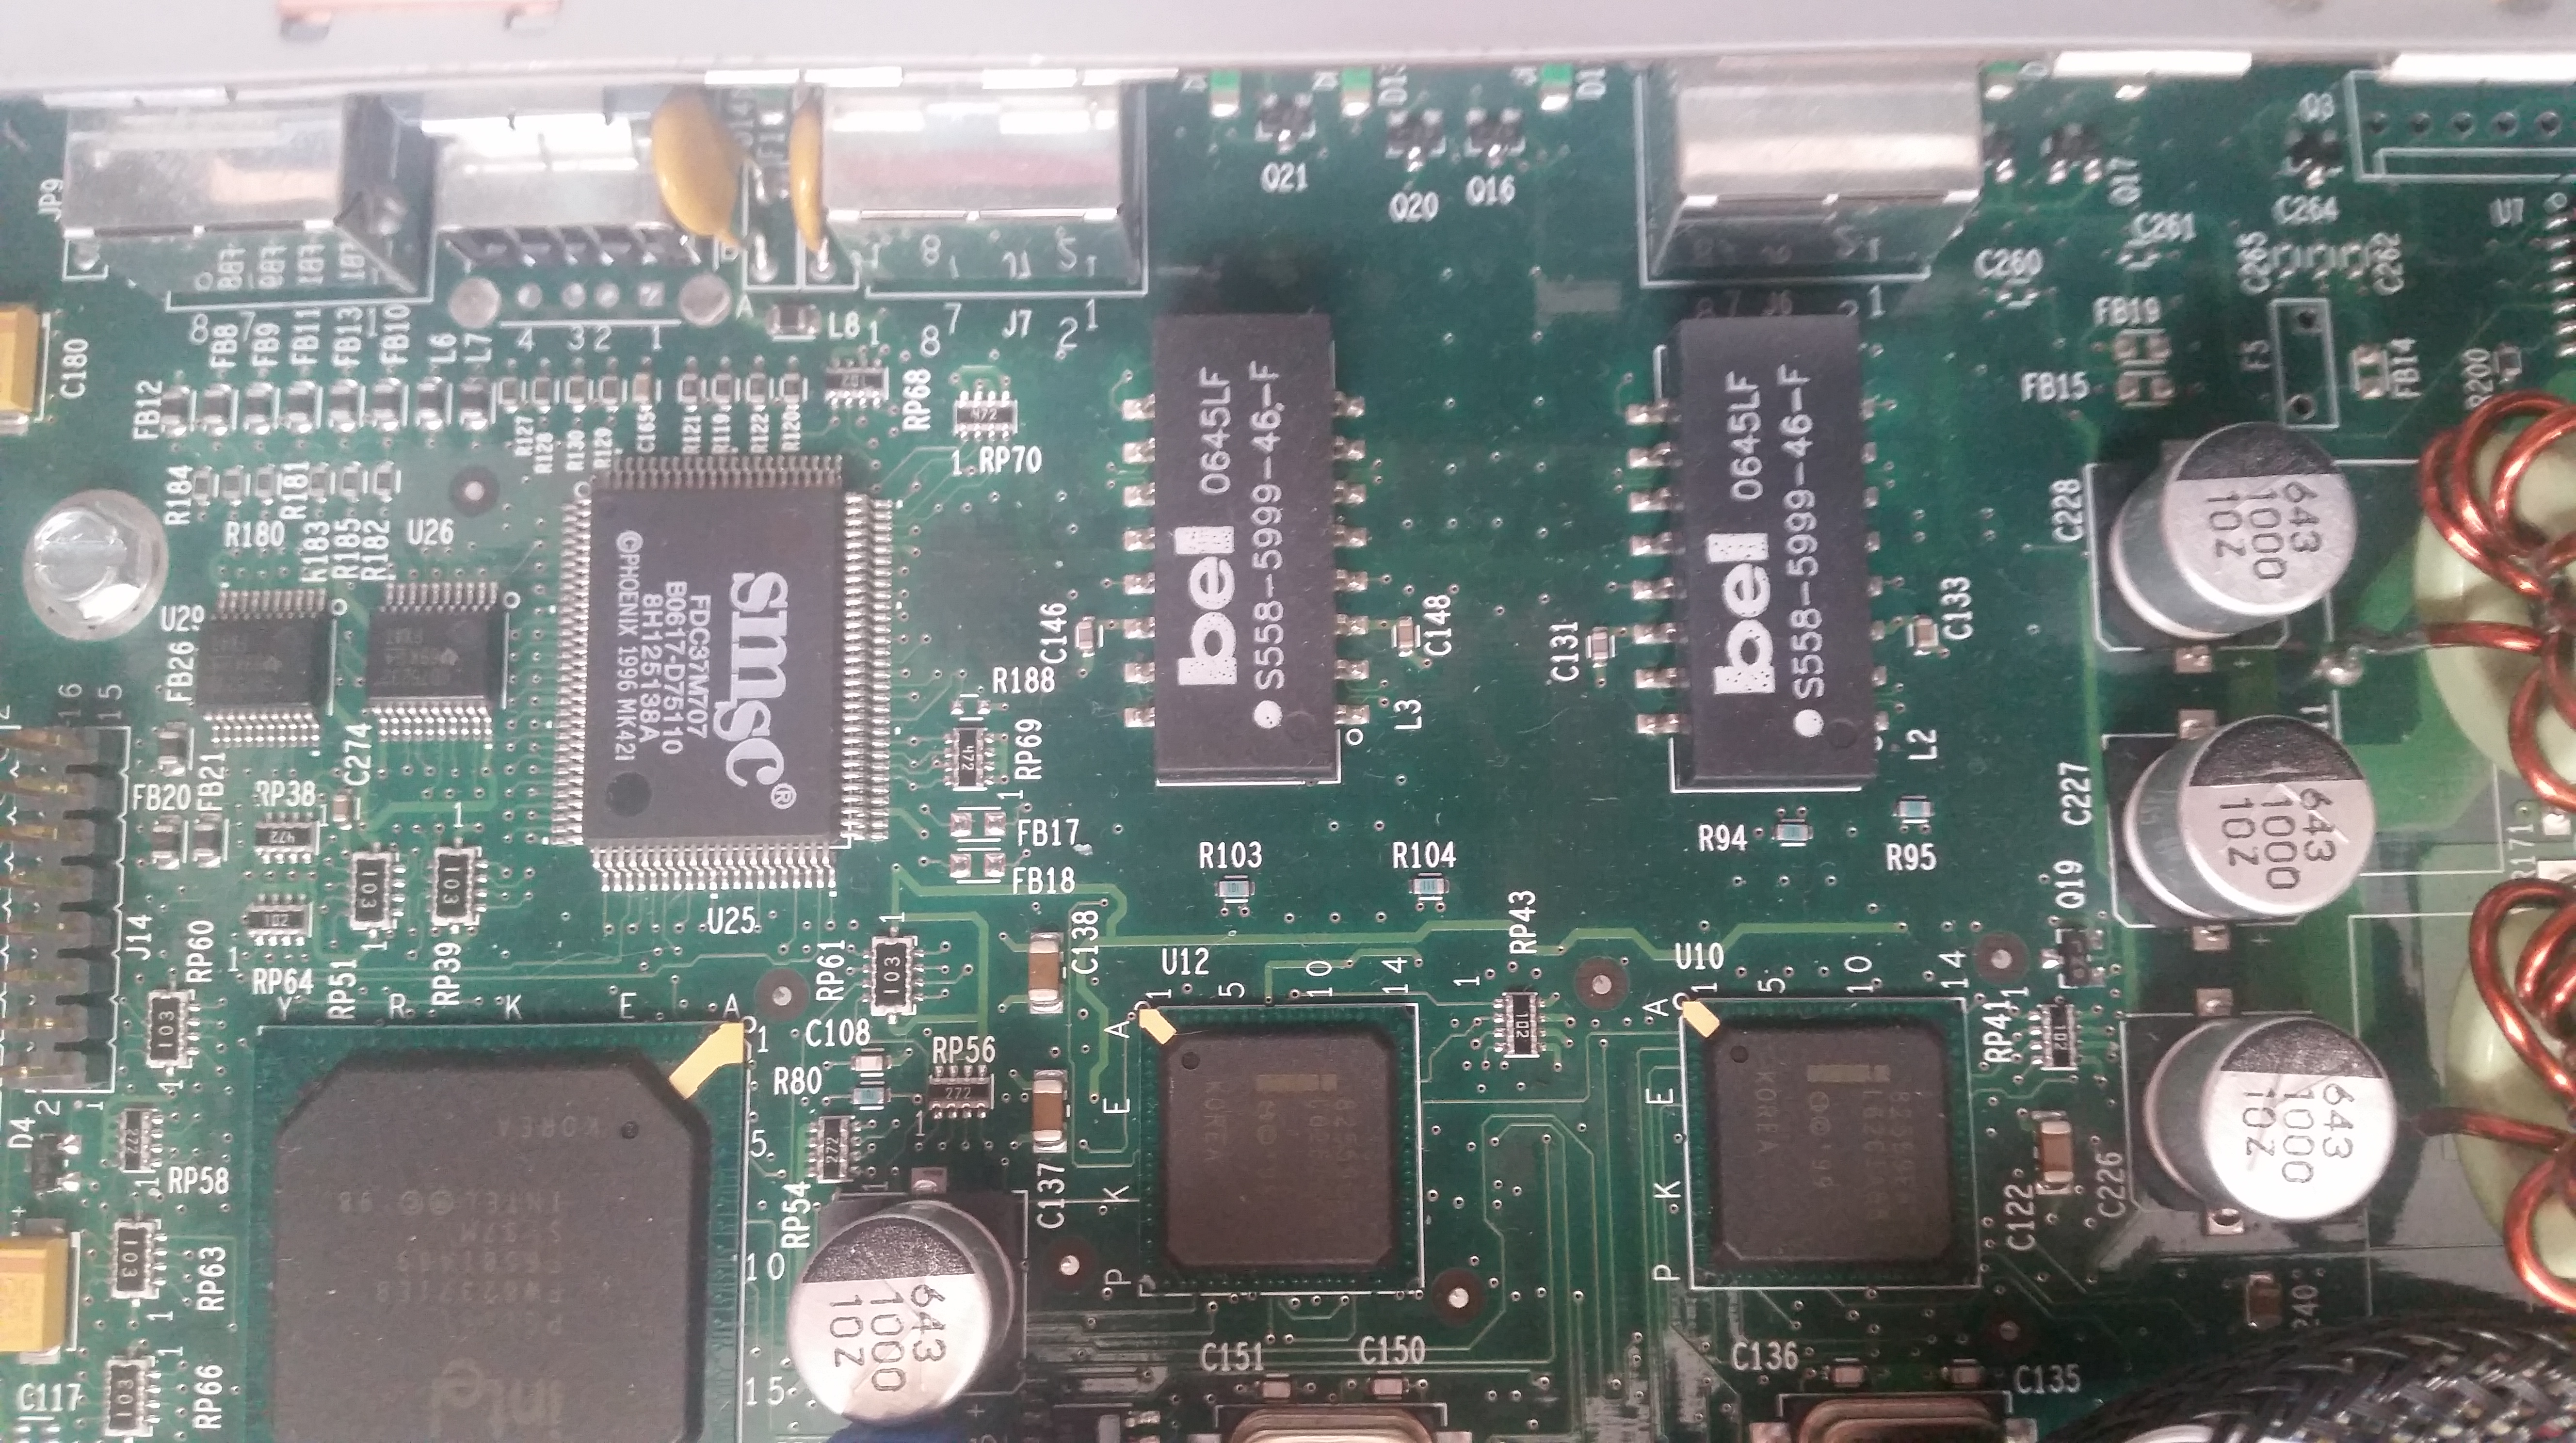
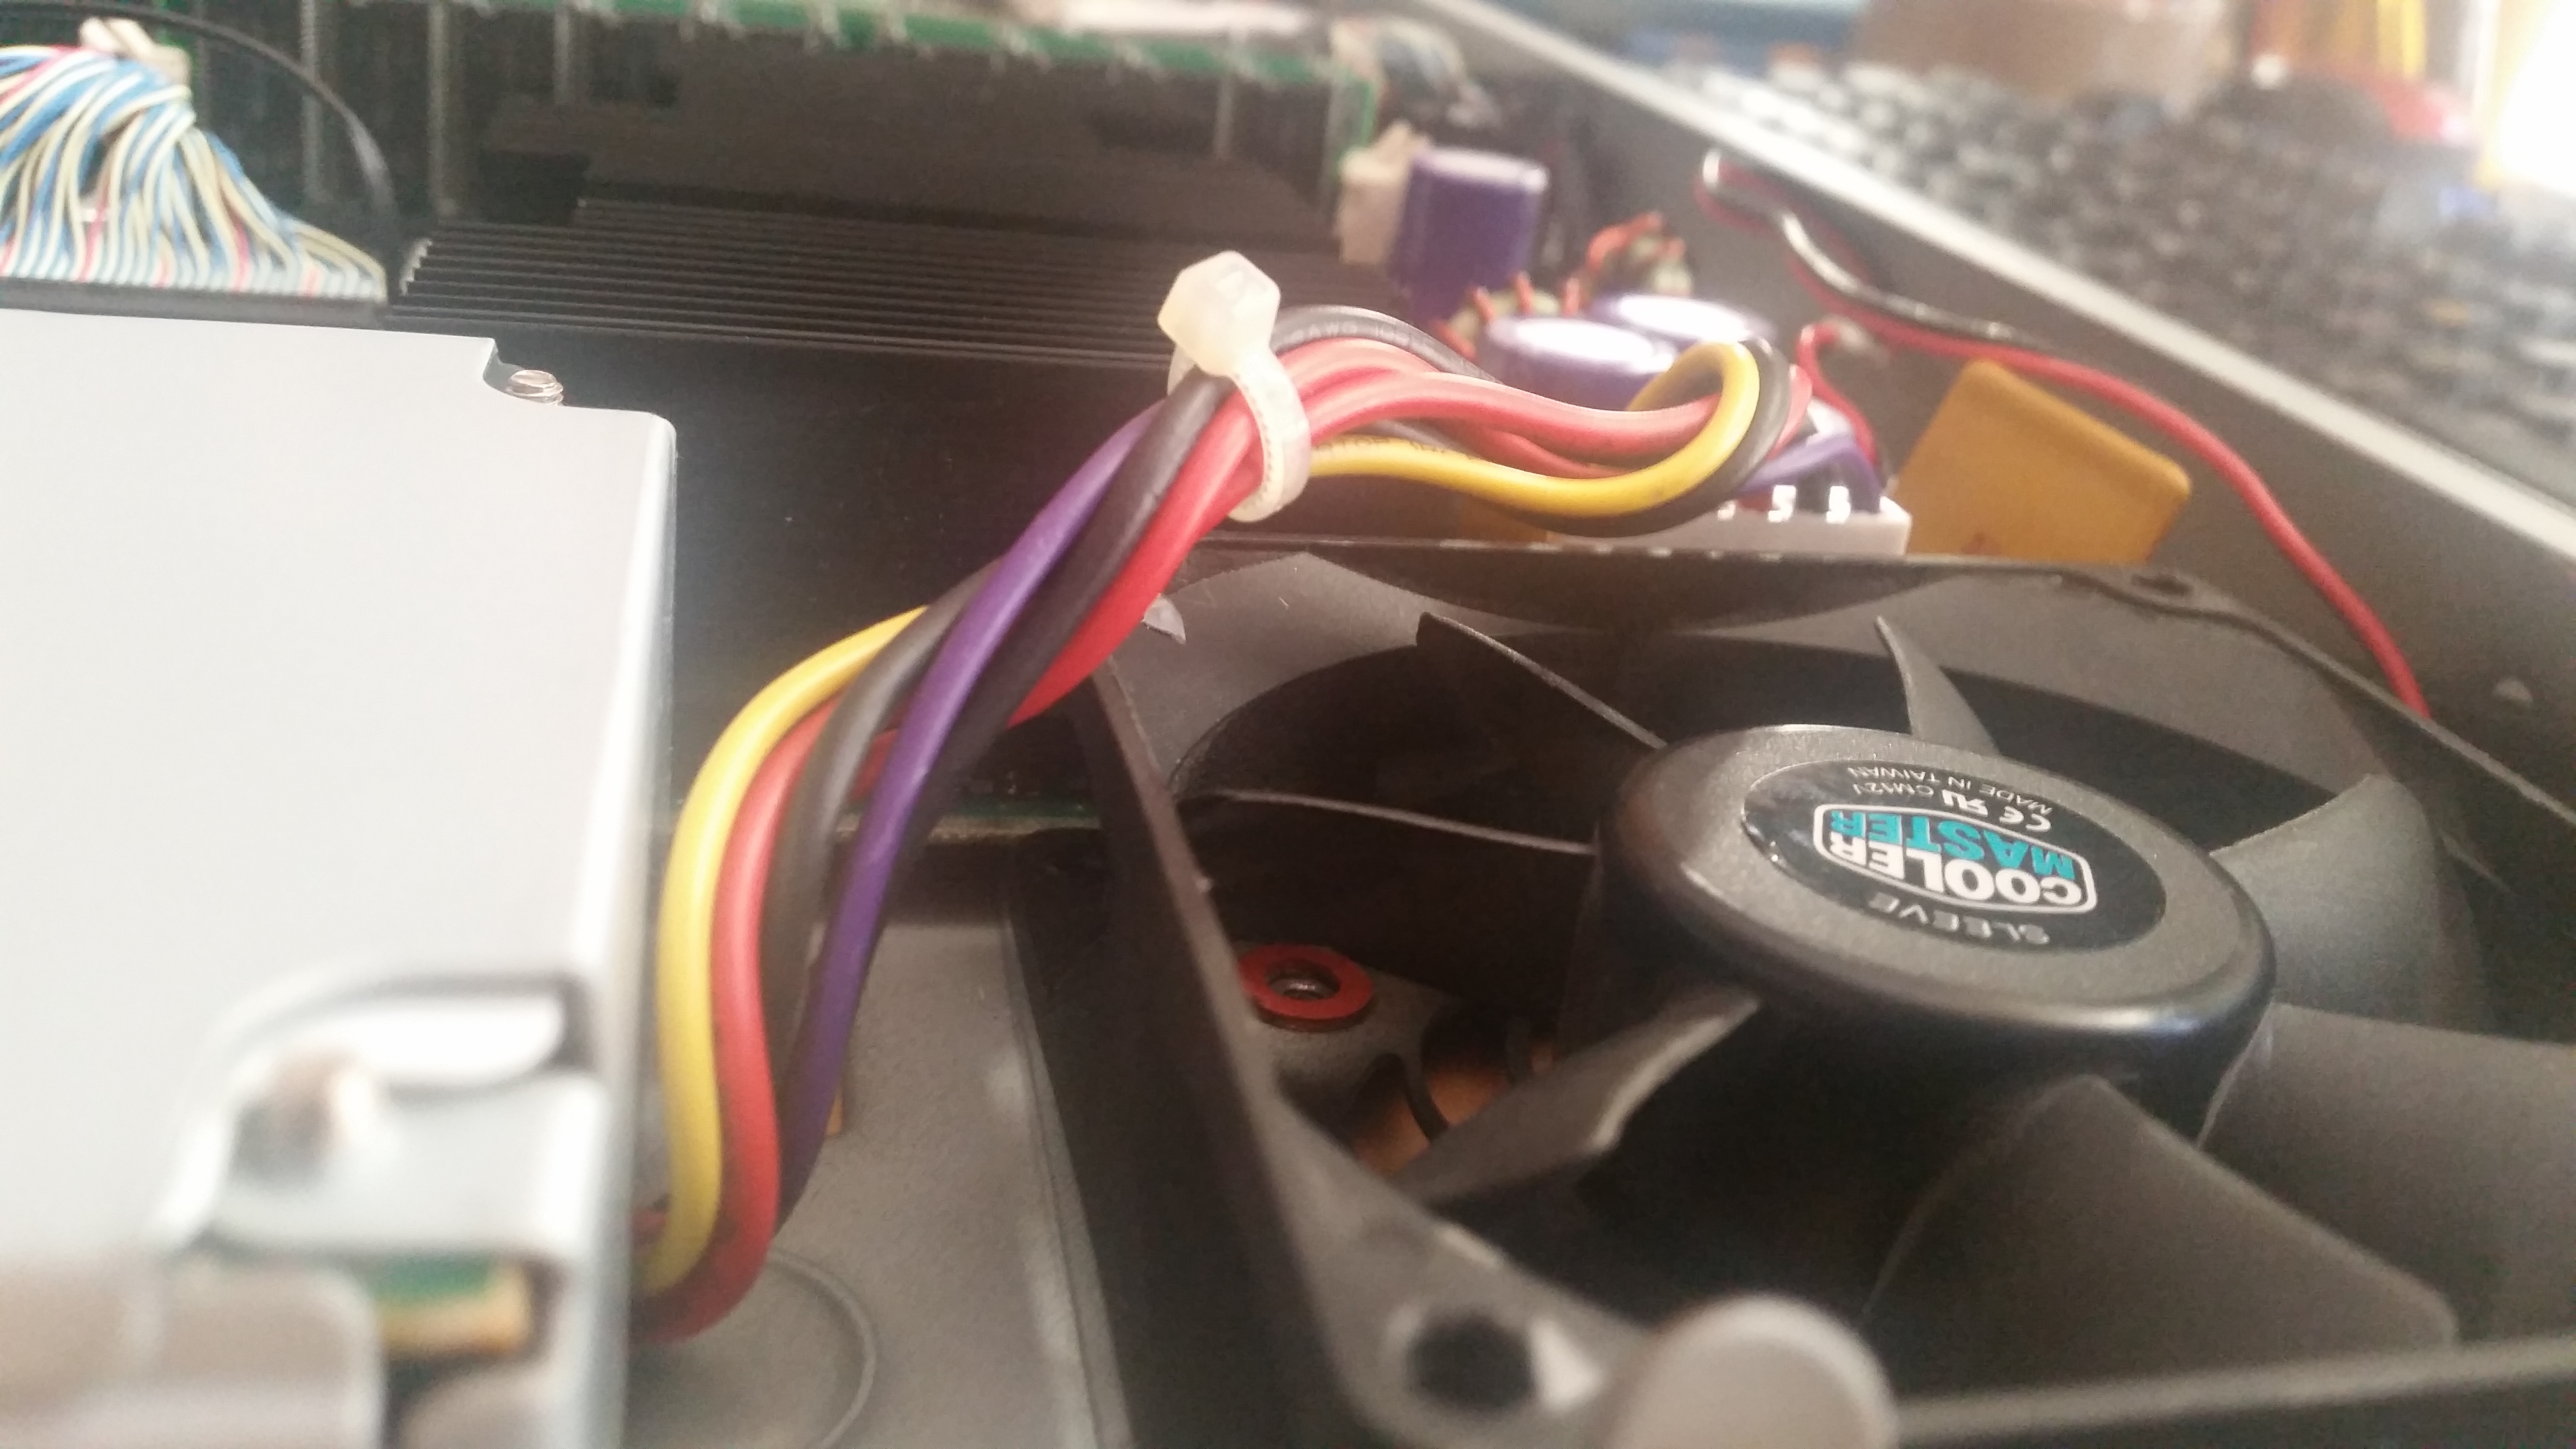
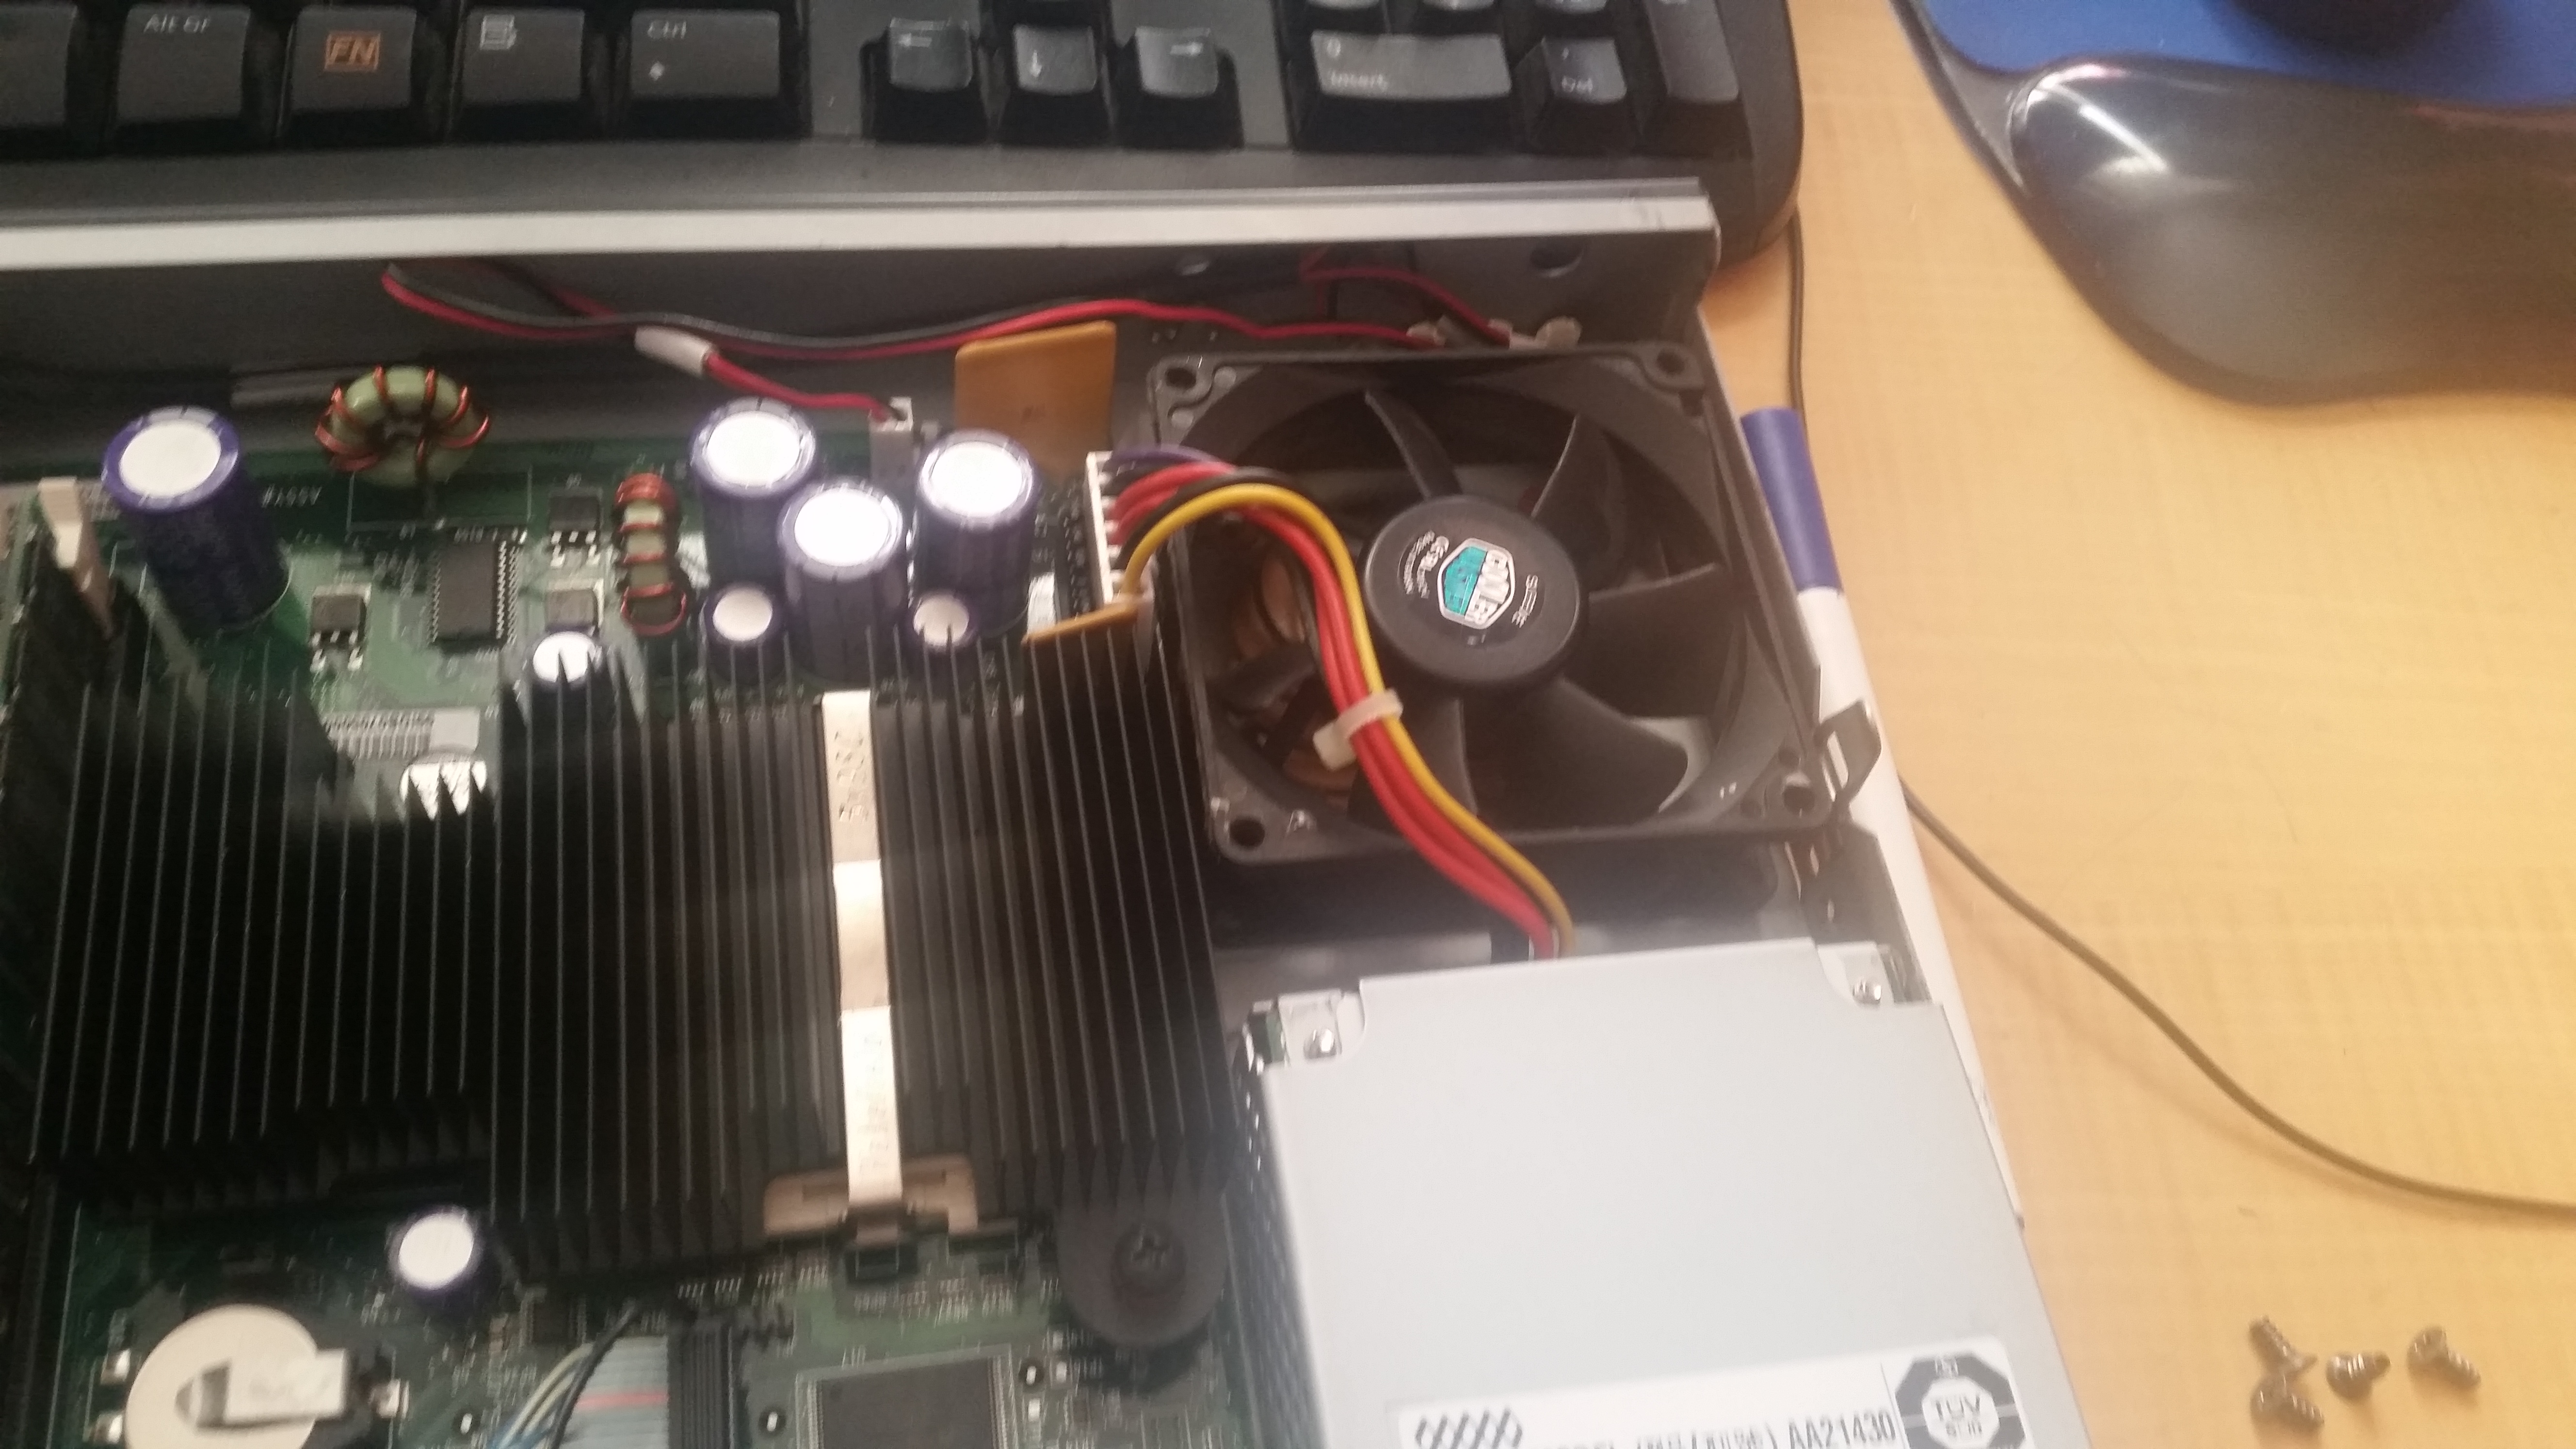
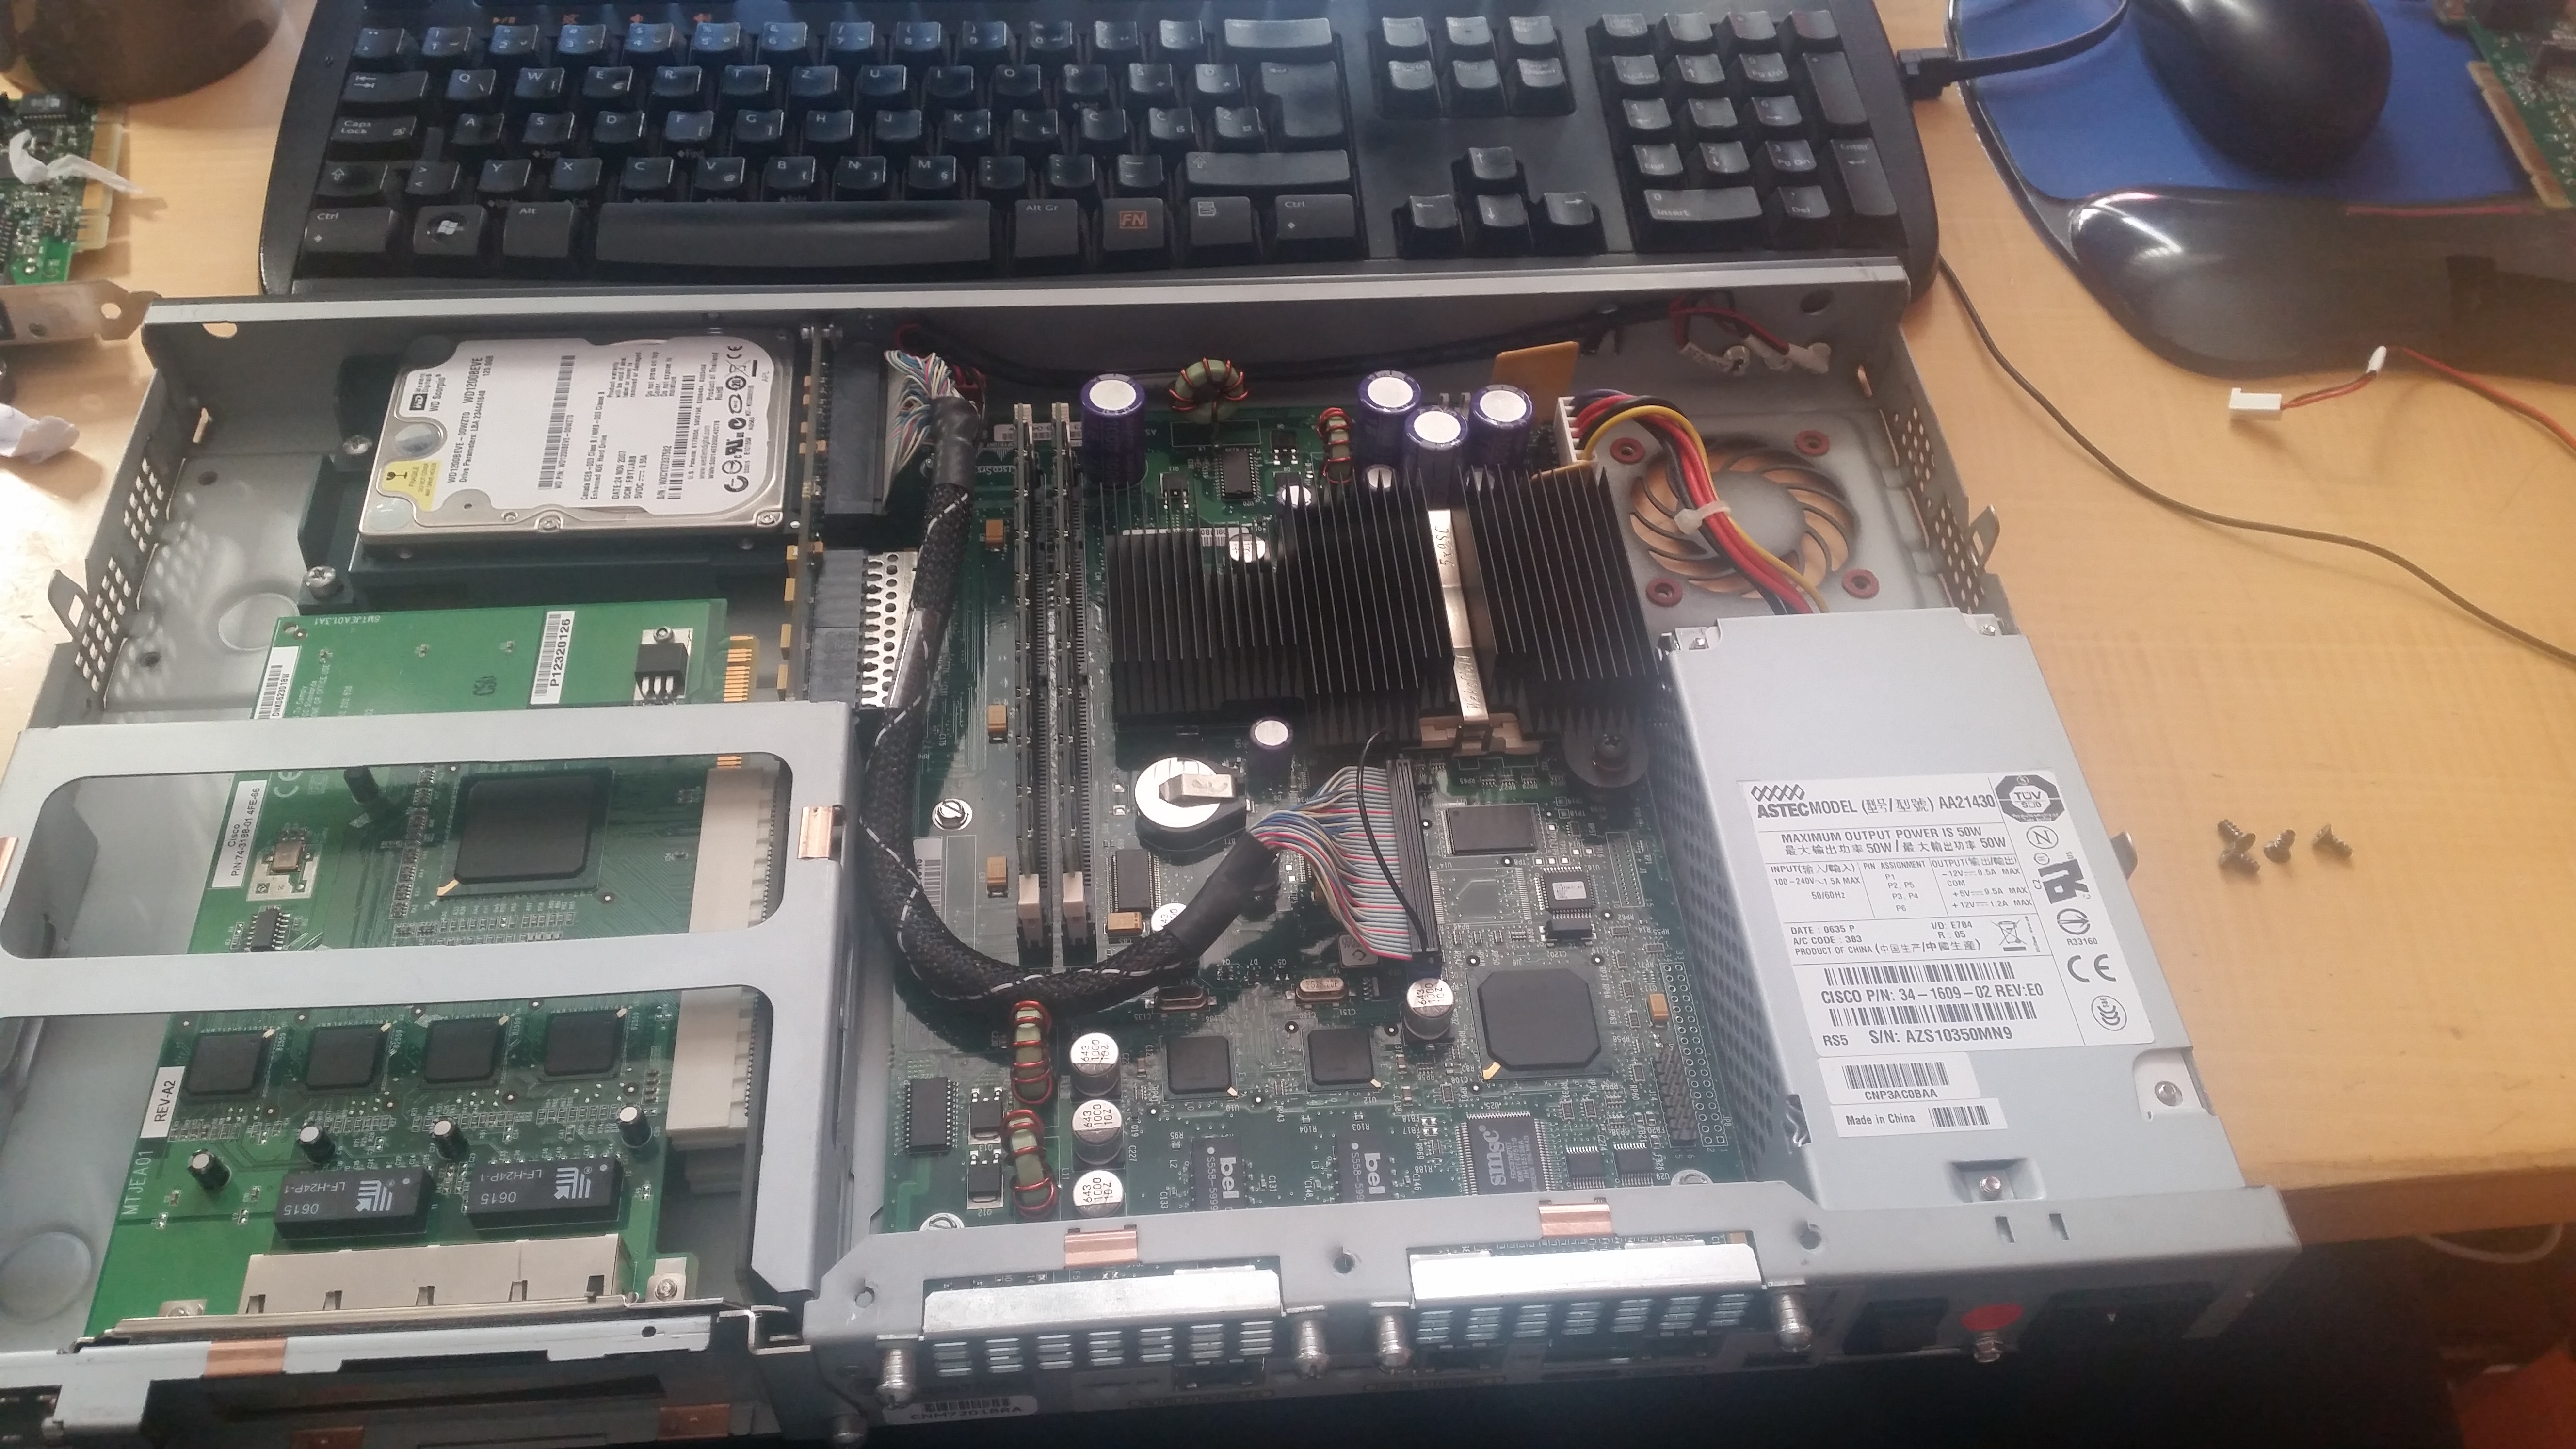
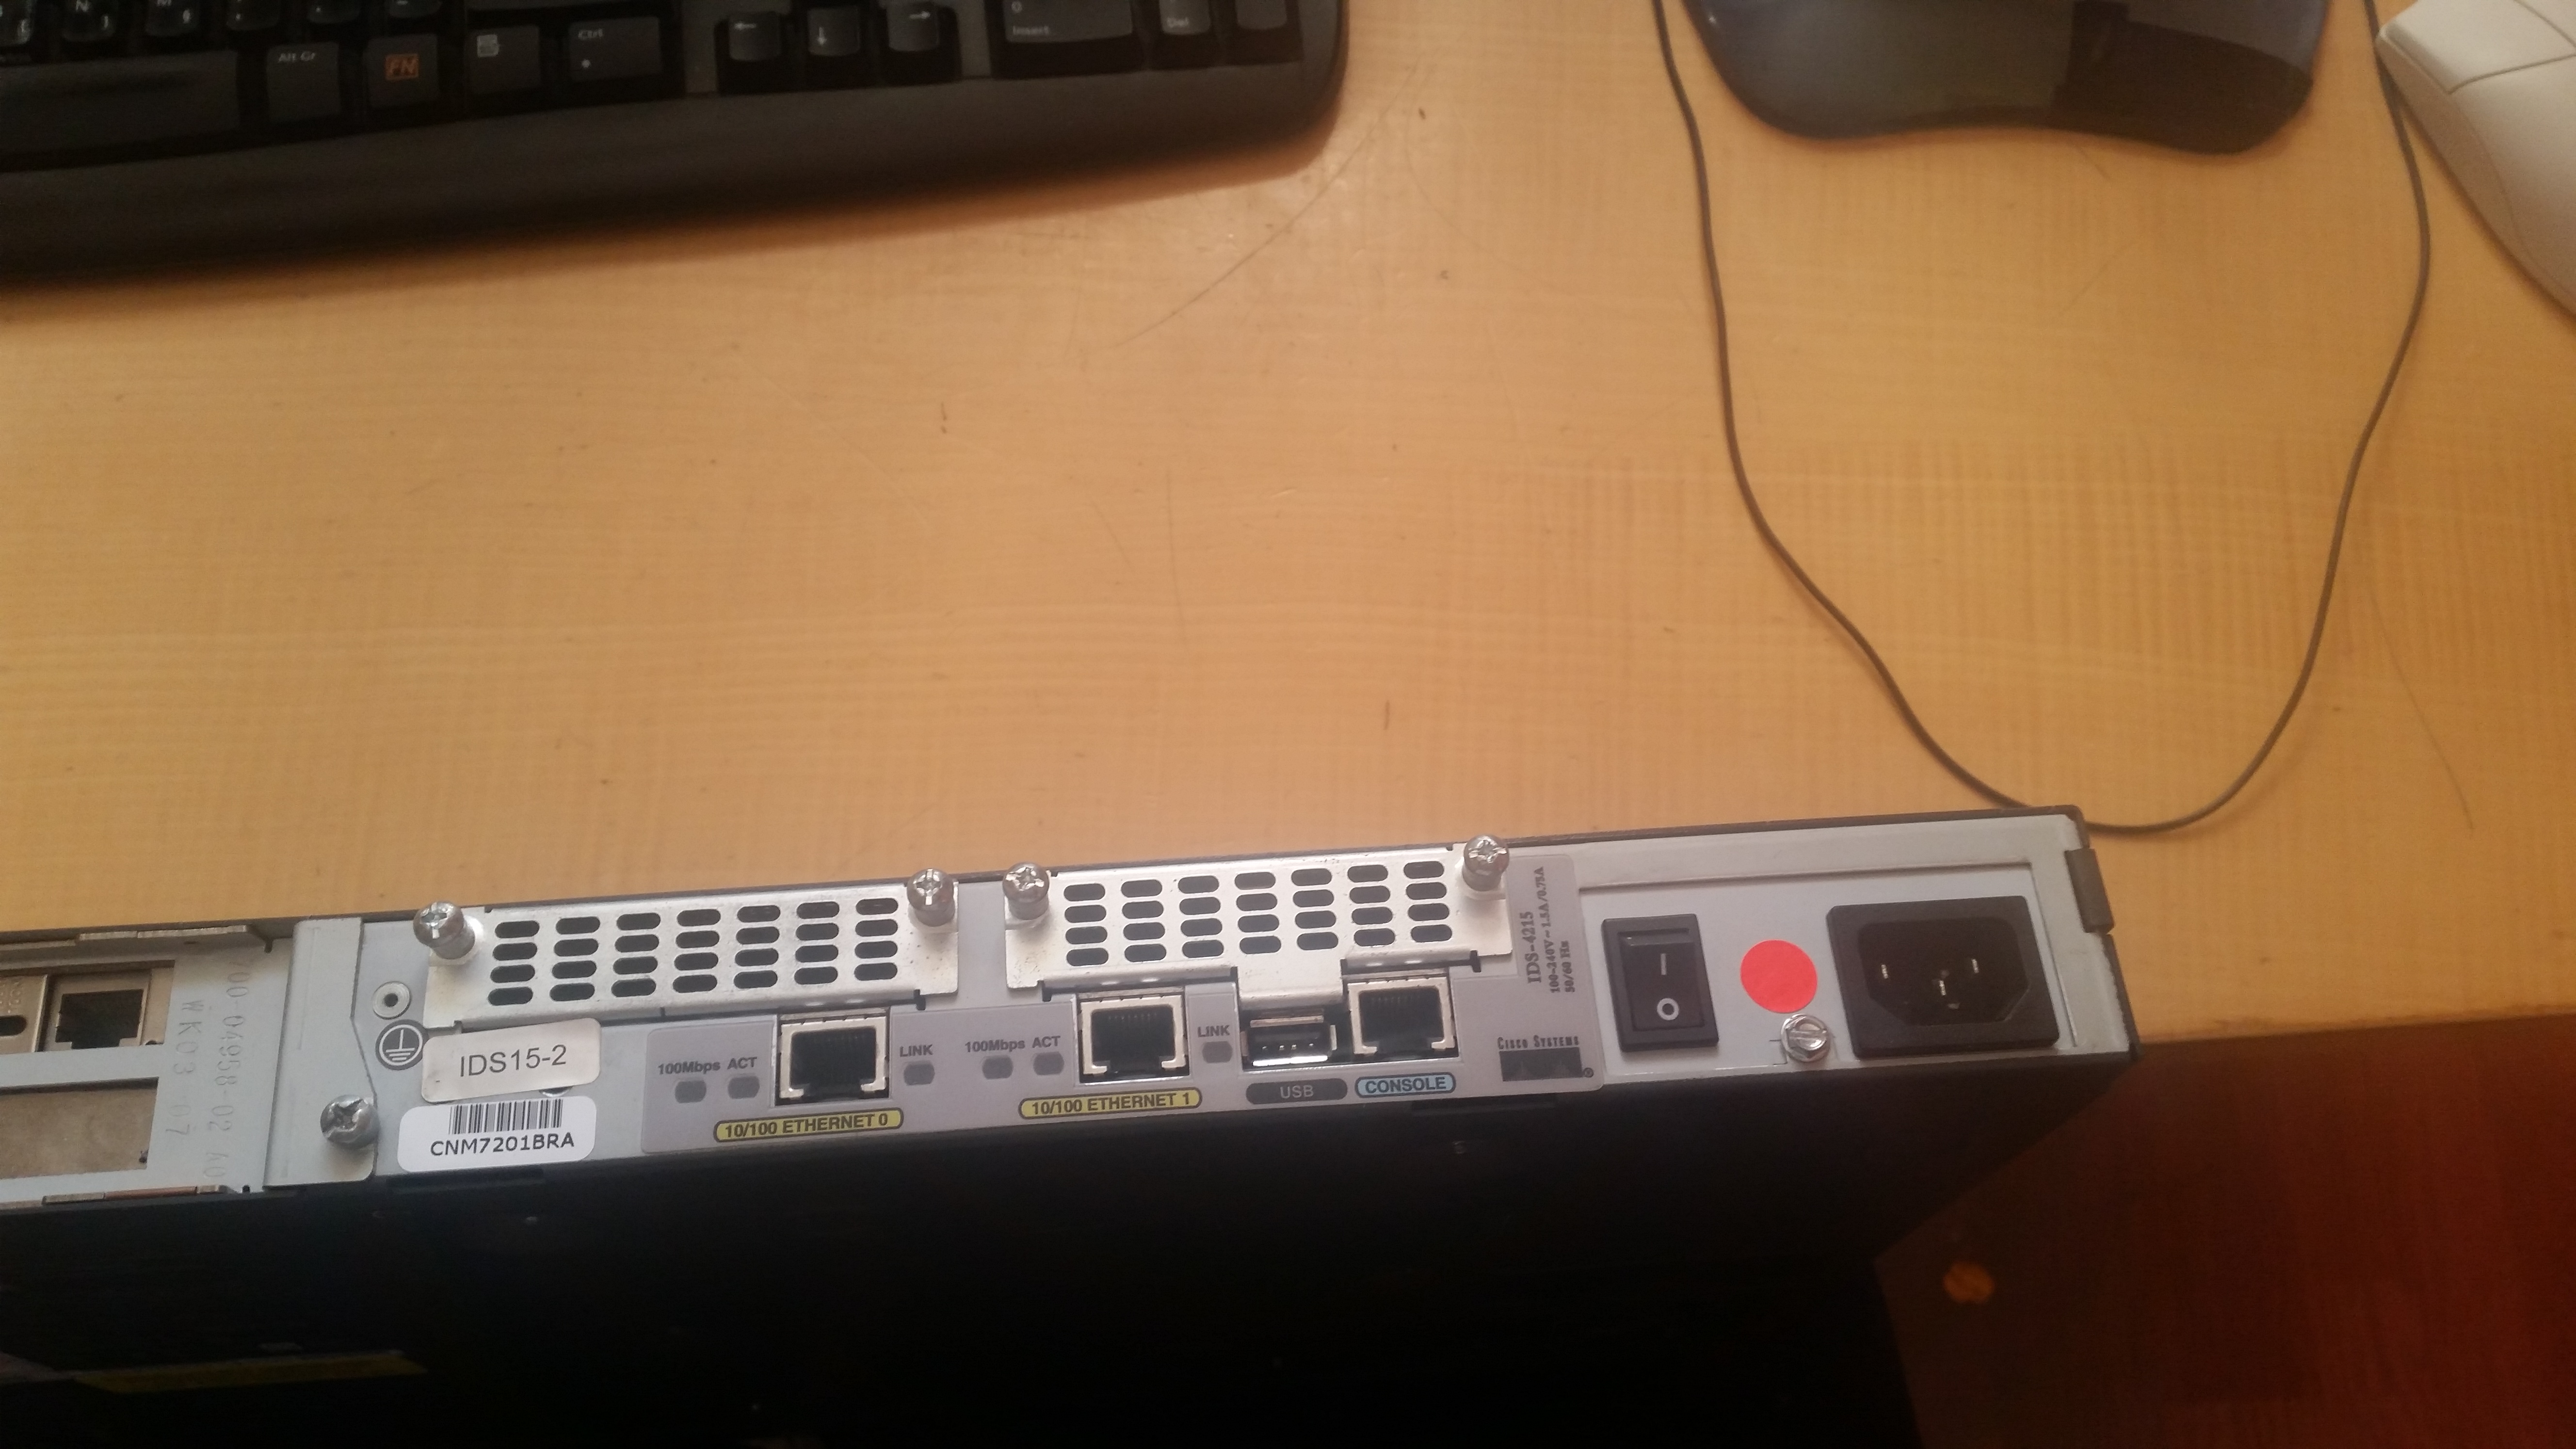
I’m not too proud to admit that at first, I didn’t care about the machine itself, but rather about the add-on PCI network card with 4 Fast Ethernet interfaces. The sensor has obviously seen better days, as it had a broken front panel and needed some cleaning, but upon a closer inspection under the hood (which is held closed by the 4 screws on top), this IDS consists of an embedded Celeron PC with two onboard Ethernet cards, a 2.5″ IDE hard disk, a CF card, and 2 PCI expansion slots (more on them later). Oh, and don’t forget the nasty server-grade fan, which pushed very little air for the noise it was making.
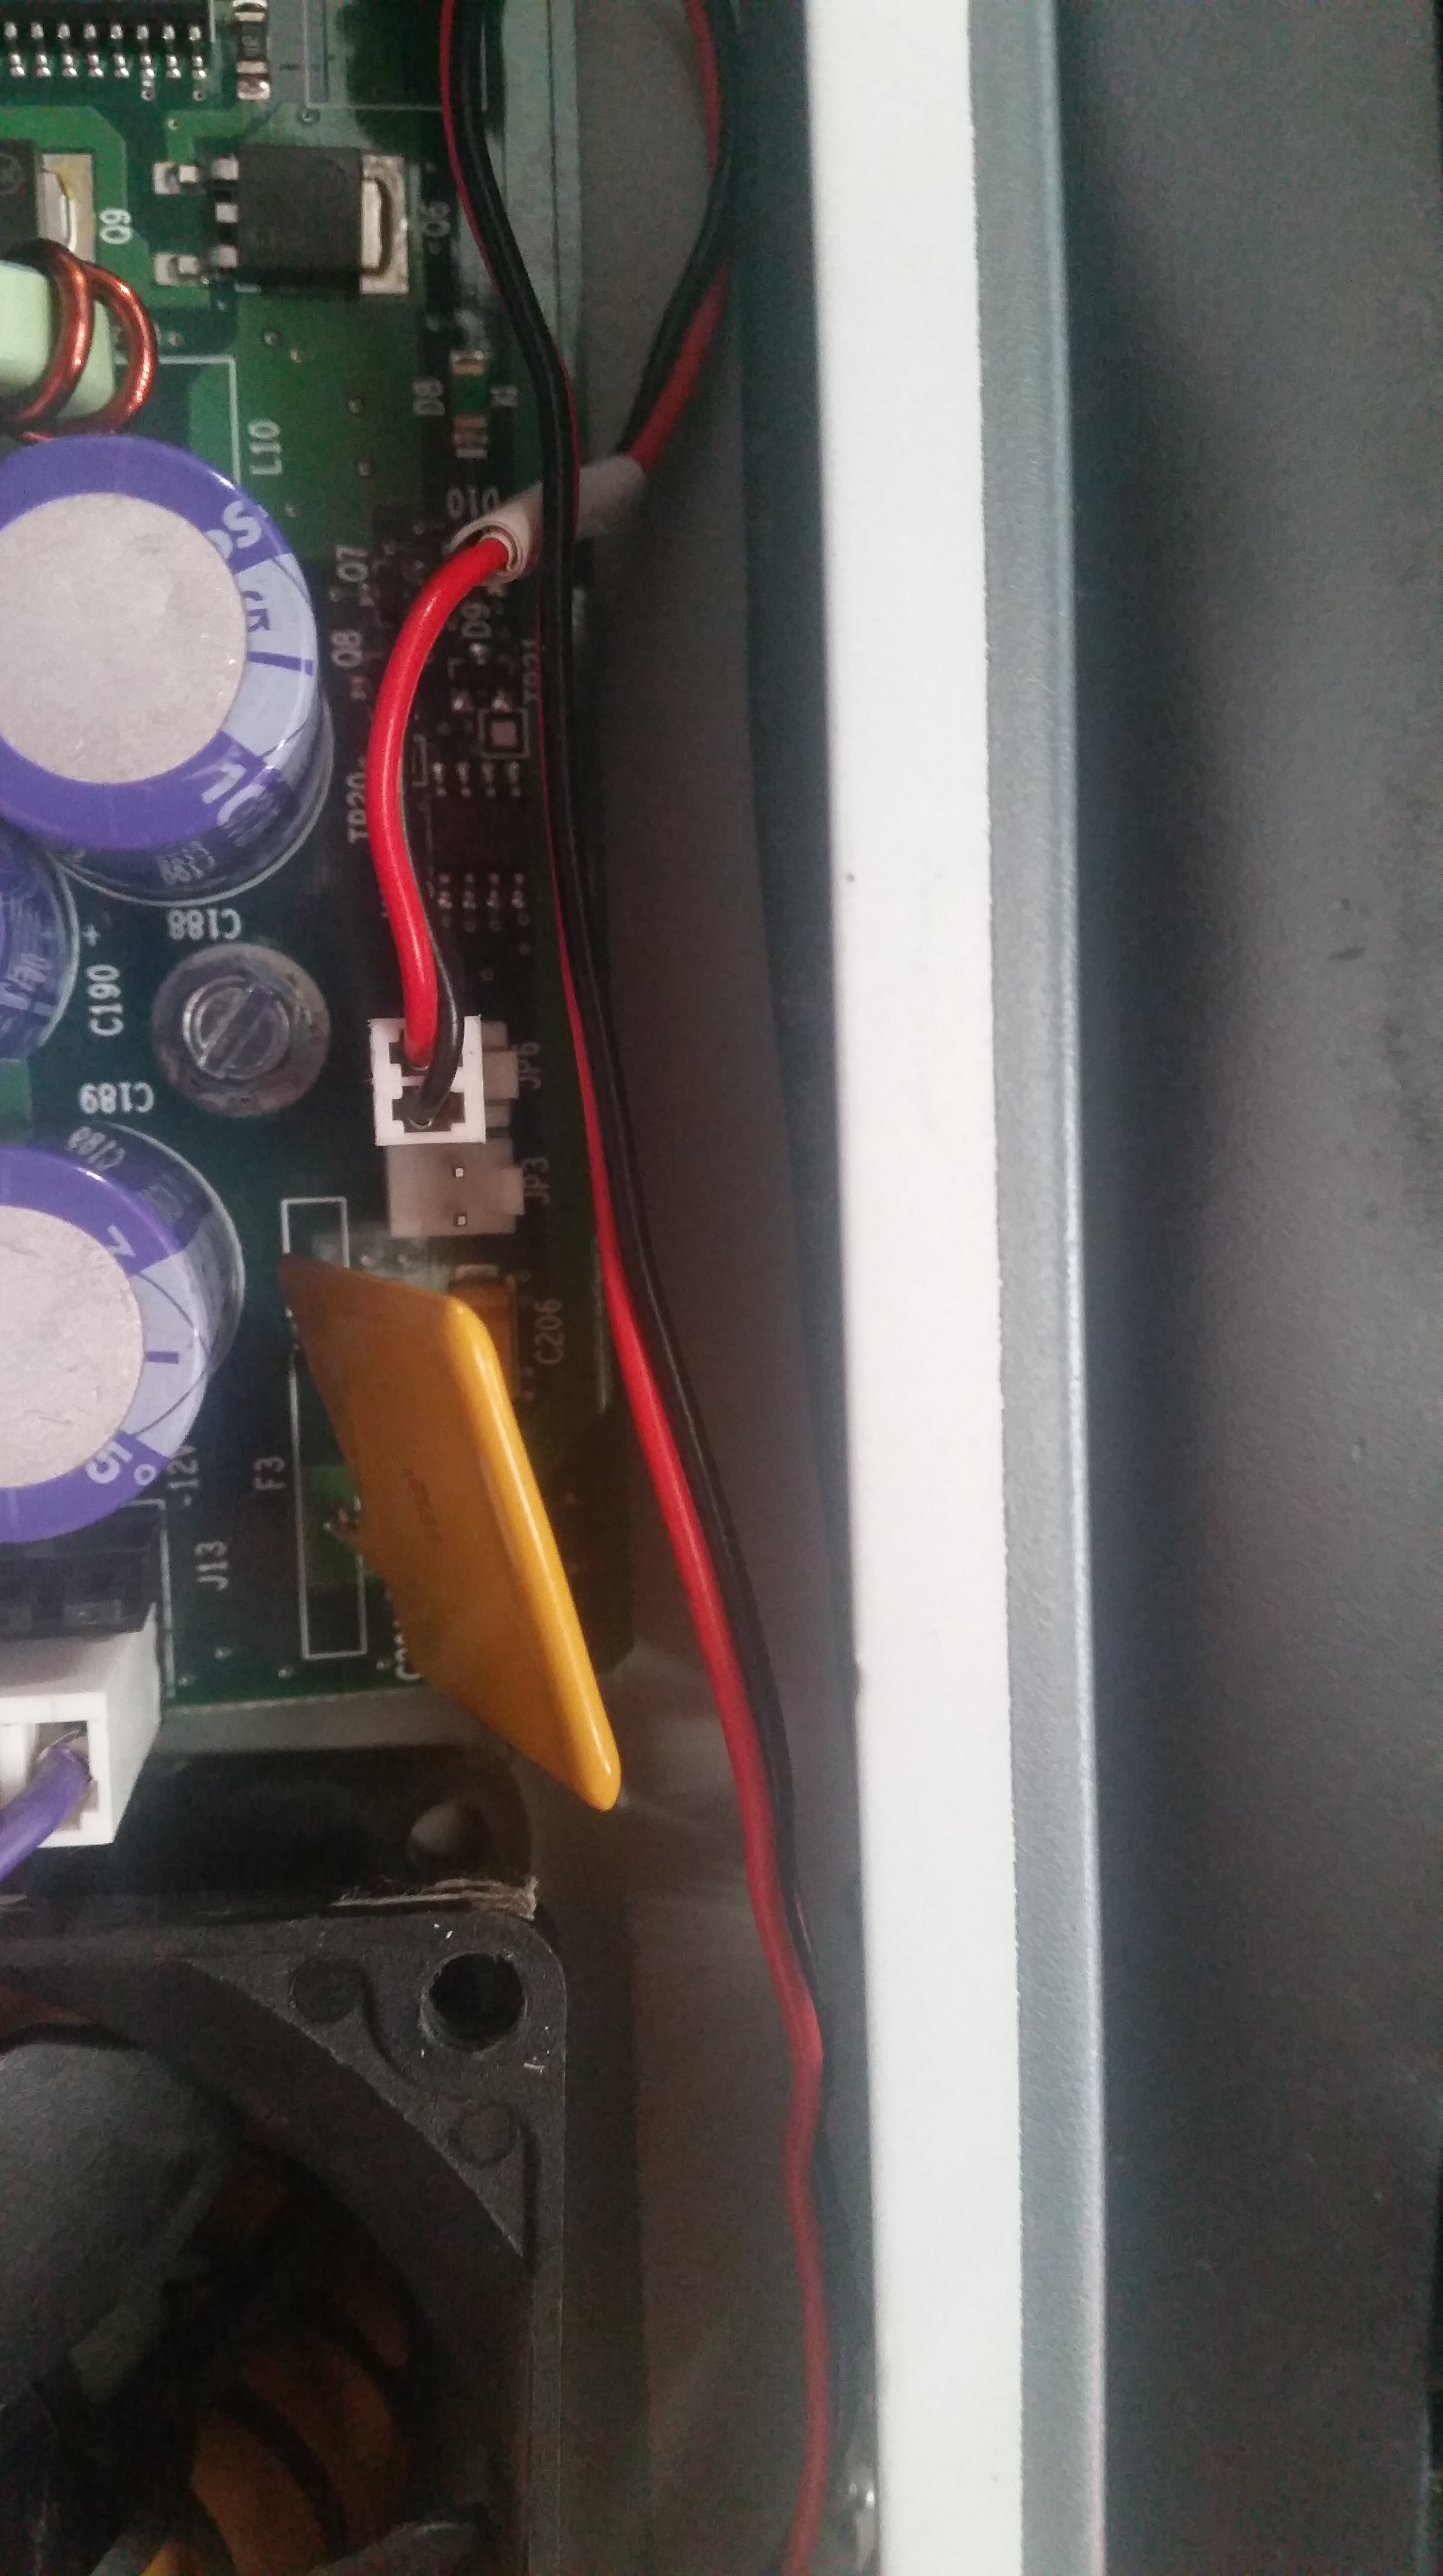
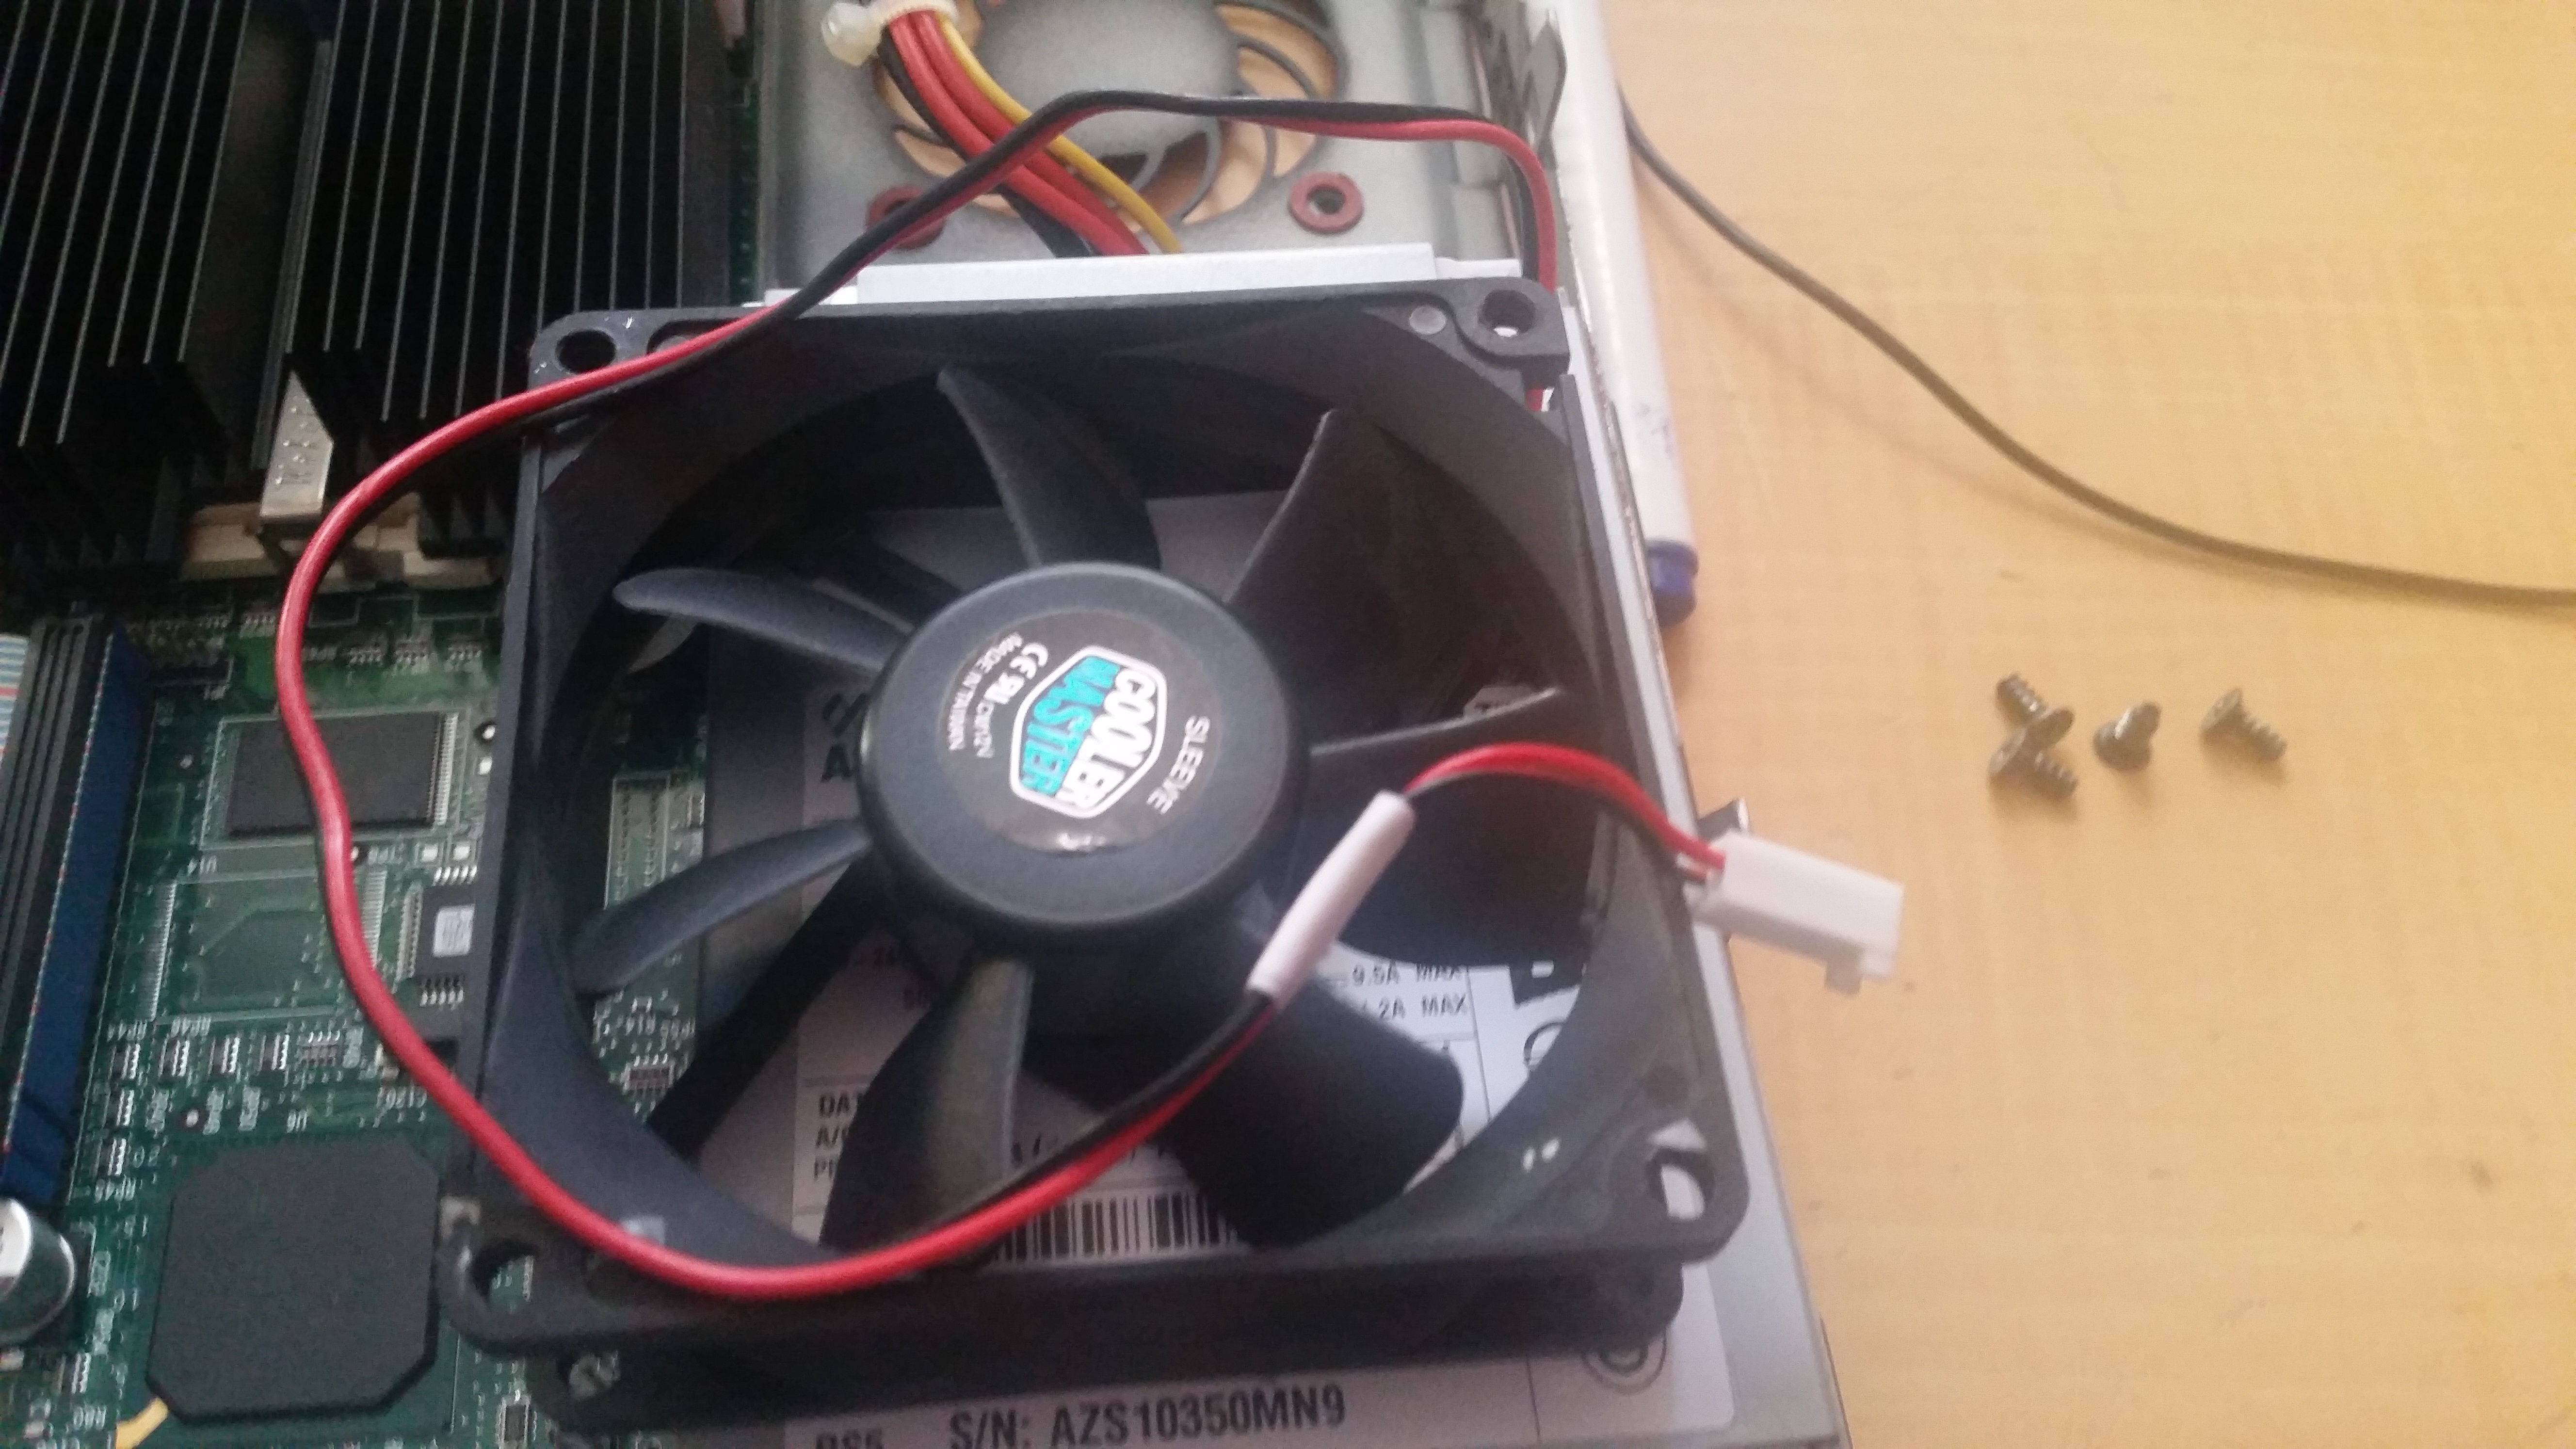
First off, the fan needed immediate replacing with a sleeve-bearing 80mm Cooler master. The whole fan assembly can be unscrewed with ease, and after that, the new fan can be slid in. The fan connector is 2-pin, labeled JP6 on the motherboard. I cut off the connector from the original fan and soldered it to the new one. The results are aesthetically pleasing, and most importantly working correctly. To prevent the power cables from entering the fan blades, twist the connector once or twice, and the cable torsion will keep them in the air, not touching the fan.
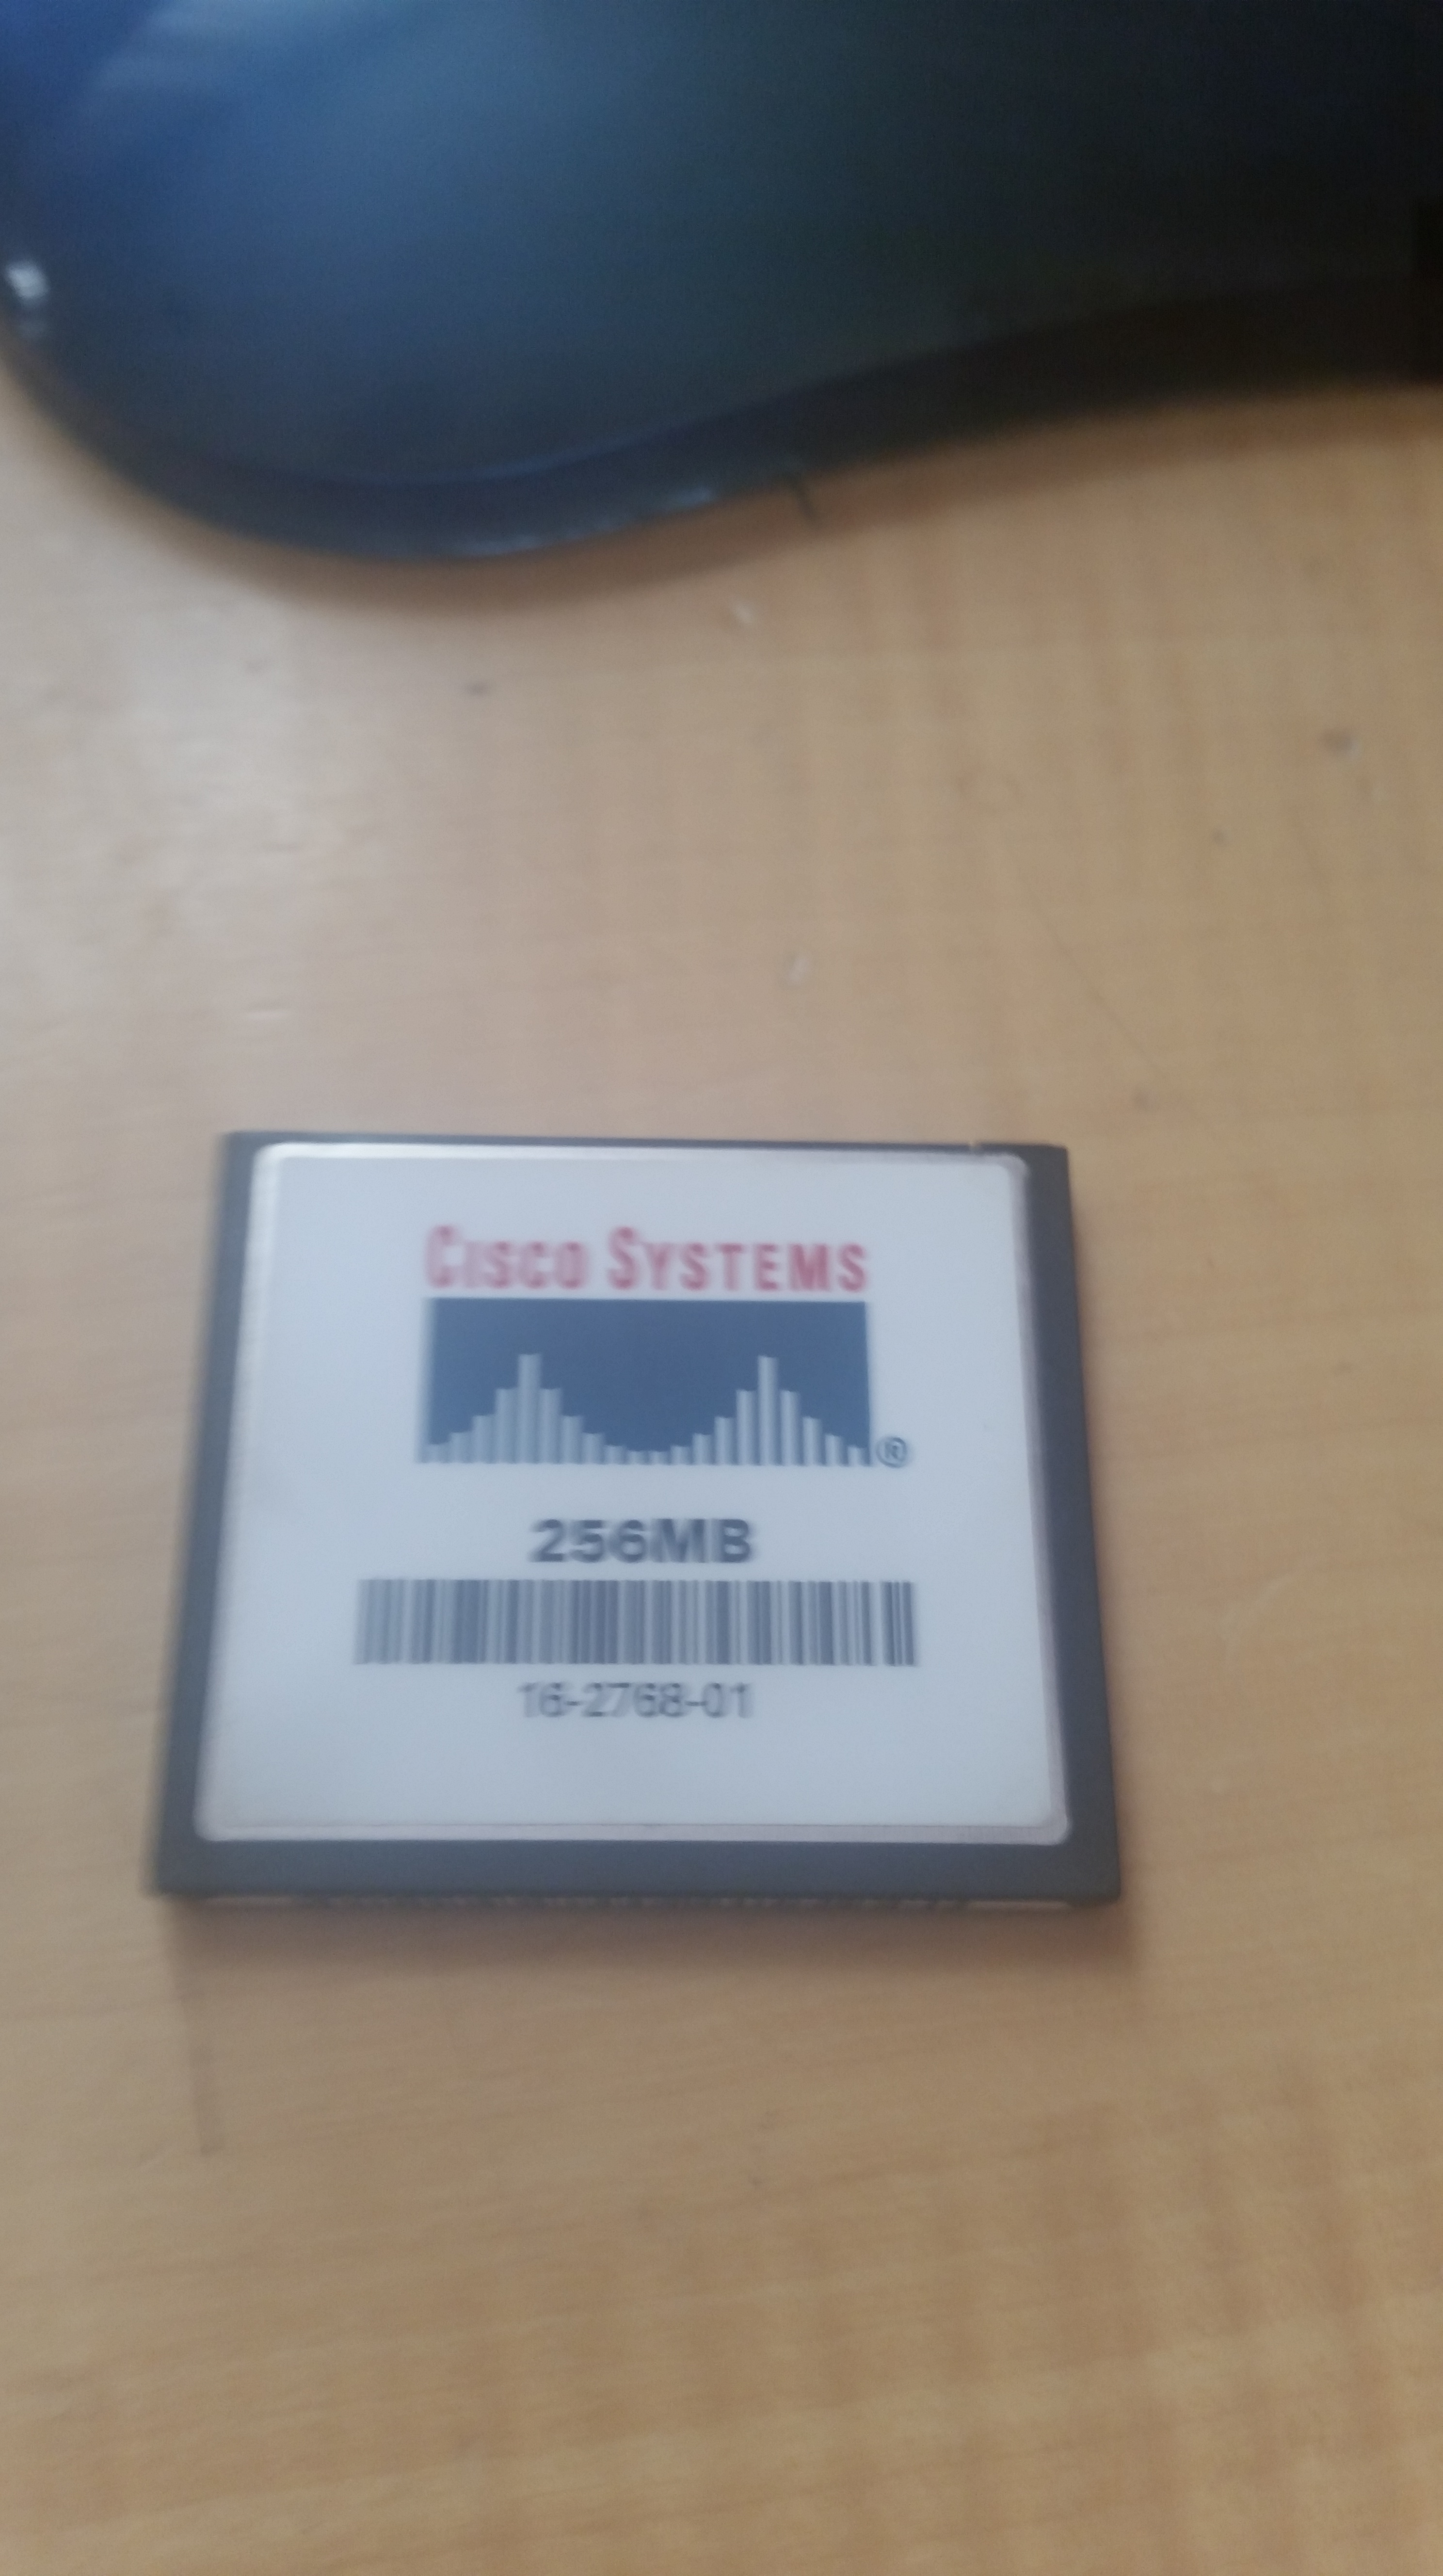
Storage-wise, the IDS has a 256 MB CompactFlash card, probably as a boot drive, and a 40 GB IDE hard drive for data. I replaced the hard drive with a 120 GB one, as I had one on hand, but held on to the CF card, as I used it in the installation process.
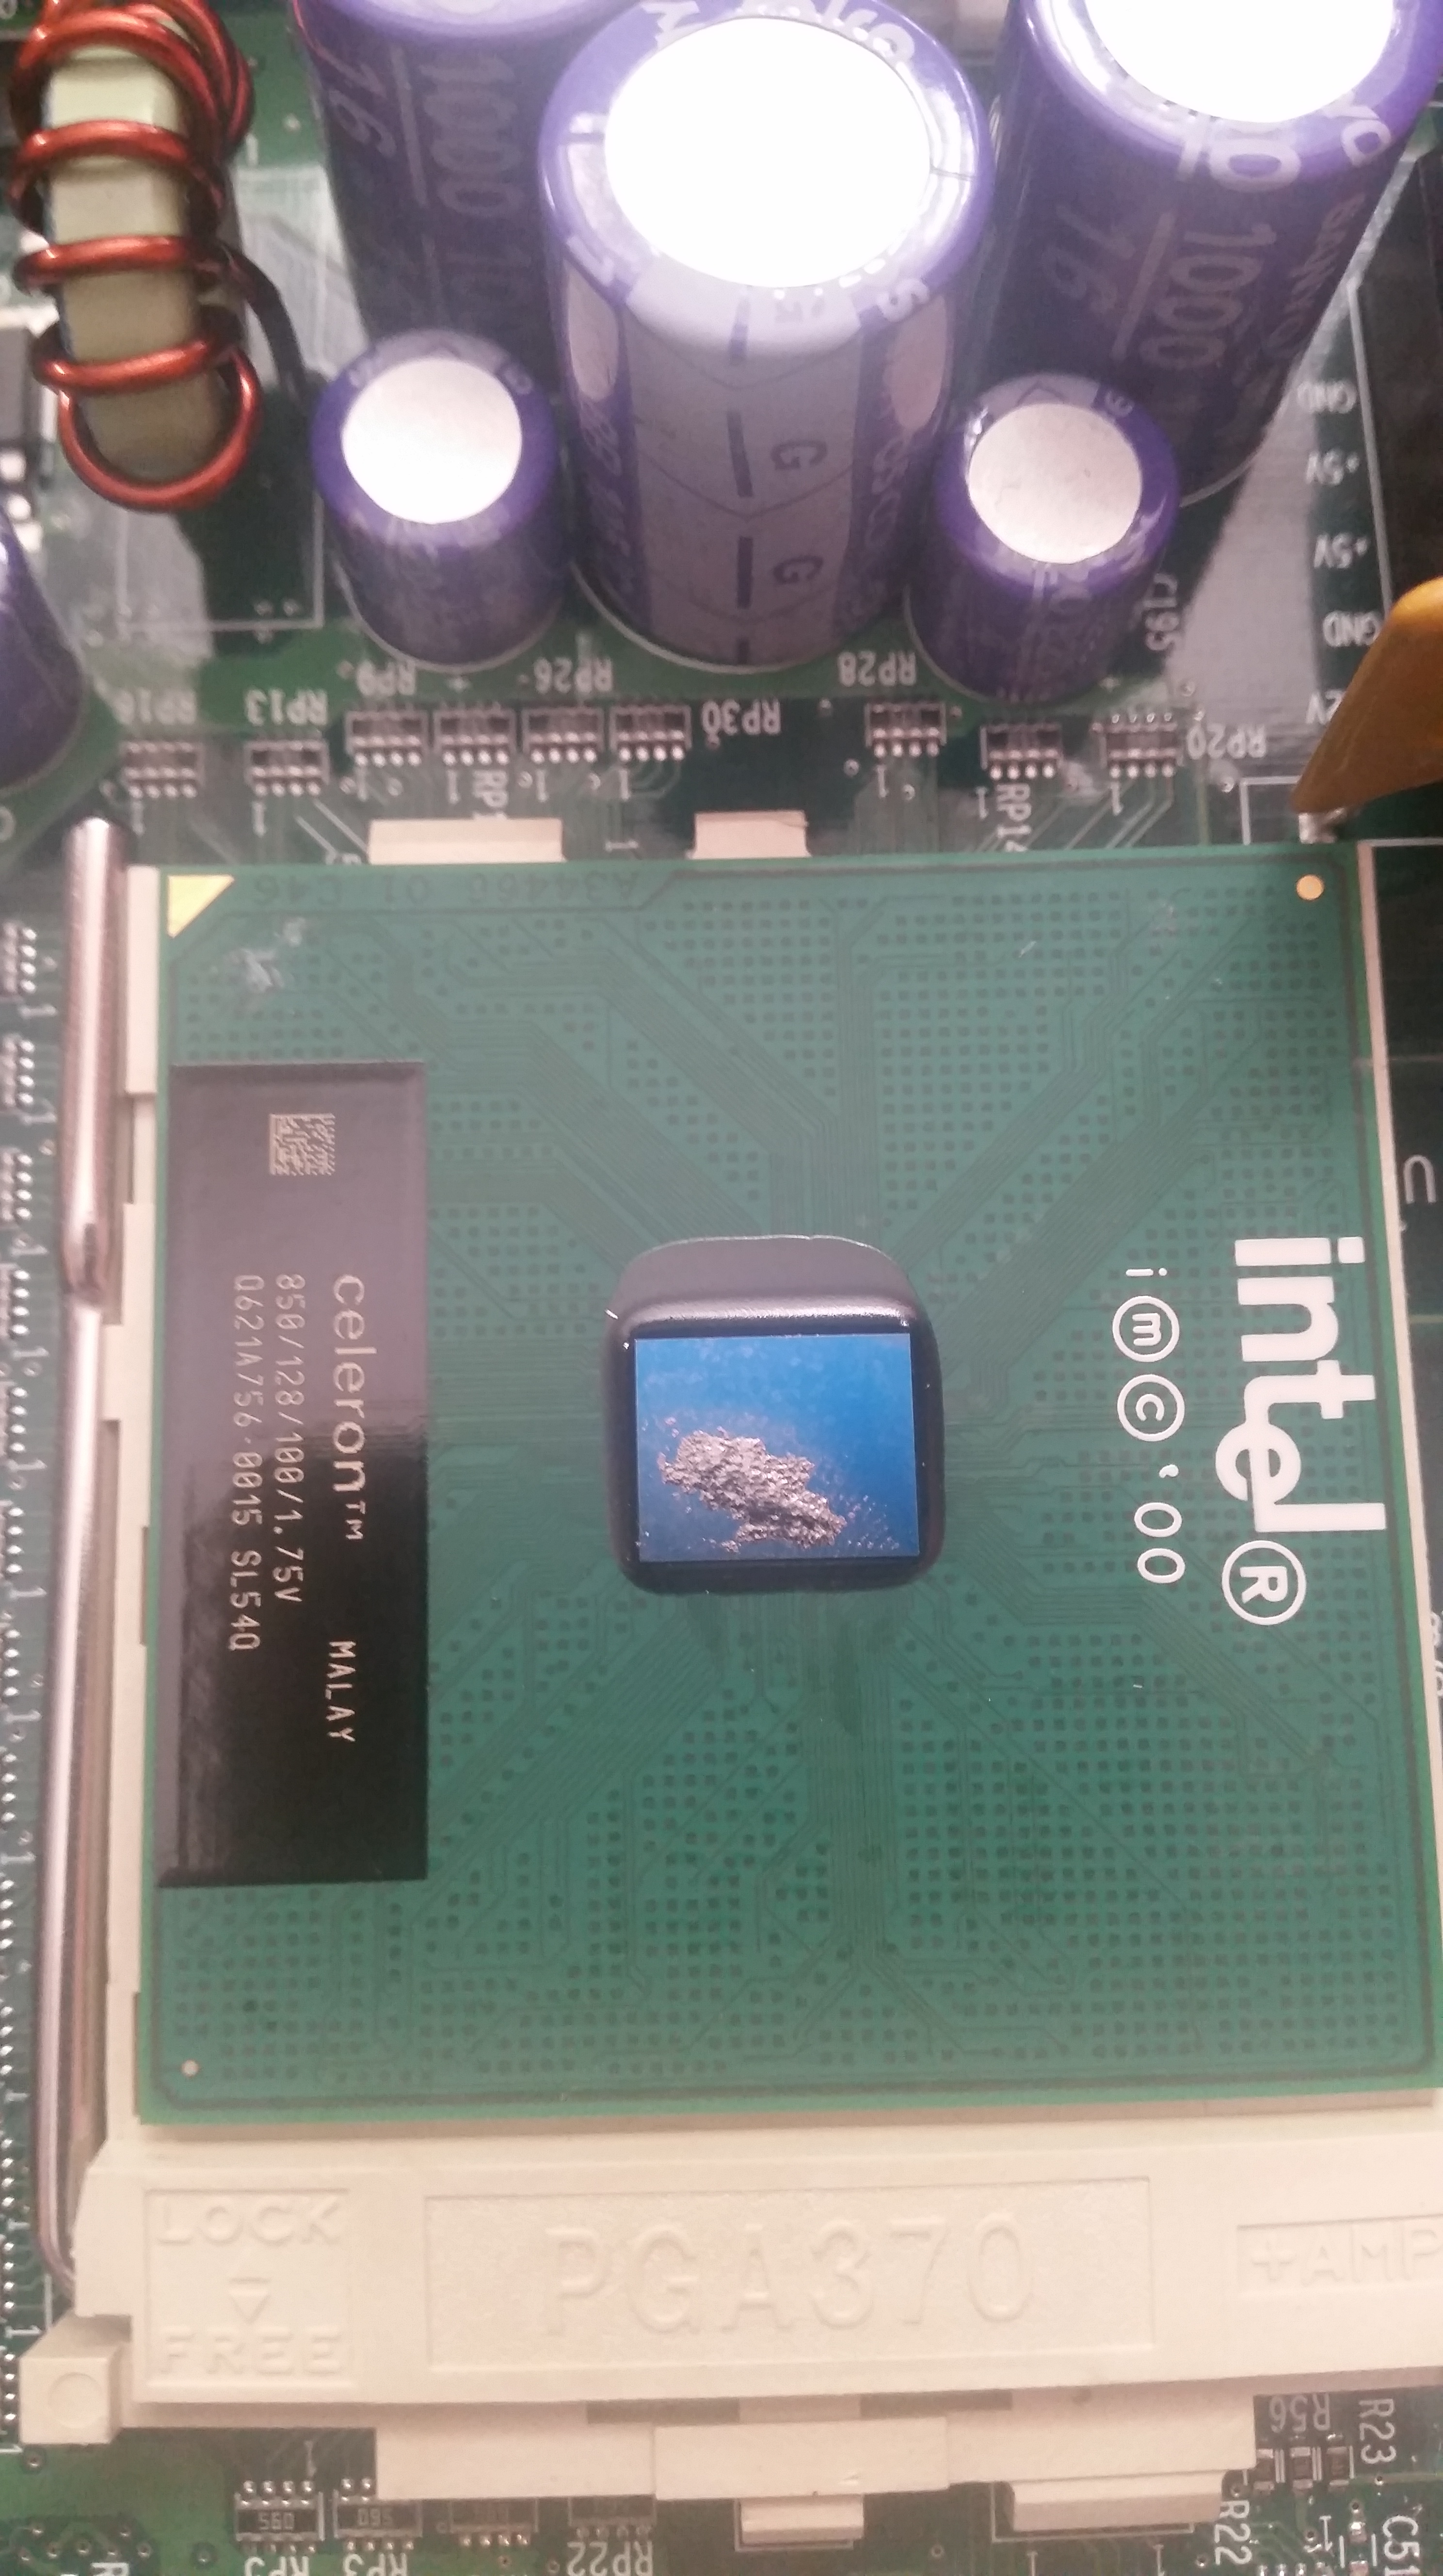
Processing is done by a passively cooled Celeron in a PGA370 socket, paired with two sticks of USA-made RAM, totaling to 512MB.
Onboard network is done by two Intel 82559 PRO/100 Fast Ethernet cards, which can be (and in my case also were) expanded with PCI expansion card(s). Apart from that, the board also has one USB 1.1 port and a standard Cisco RS232 console connector. It has no onboard video or audio, which is expected for an embedded network appliance.

Installing OpenBSD
So, how do you get around installing an operating system on a computer which has no video output nor console redirection? For Windows and most Linux distros, you can’t, but OpenBSD, an *nix-like OS, does it beautifully, because it uses console out-of-the-box! So, let’s get started with the installation.
You can grab the newest OpenBSD from one of it’s worldwide mirrors. I prefer https://cdn.openbsd.org, as it’s hosted on a world-wide CDN as the name suggests. Navigate to the OpenBSD folder, and then to the latest version, 6.4 at the time this article was written. Select the target architecture, which is i386, and download the miniroot.fs image. Use an image flasher like Etcher to flash the image to the CF card, and insert it into the appropriate slot in the IDS. Then slide the disk caddy over it, and screw it in. plug in the console, Ethernet 0, and power. Then open a terminal emulator like PuTTY on the serial port connected to the console at 9600 baud. Turn the IDS on.
The console should come alive and you can begin the installation process. User input is in bold, my comments are in Italic bold.
CISCO SYSTEMS IDS-4215
Embedded BIOS Version 5.1.7 03/02/04 11:20:35.01
Compiled by dnshep
Evaluating Run Options ...
Check for Valid Disk Image
Using drive 0, partition 3.
Loading...........
probing: pc0 com0 com1 mem[632K 511M a20=on]
disk: fd0 hd0+ hd1+
>> OpenBSD/i386 BOOT 3.34
Here, we need to tell OpenBSD to use the console at 9600 baud.
boot> stty com0 9600
boot> set tty com0
switching console to com0
> OpenBSD/i386 BOOT 3.34
boot> <hit Enter>
cannot open hd0a:/etc/random.seed: No such file or directory
booting hd0a:/bsd: 3111423+1360896+3362824+0+454656=0x7ea1e4
entry point at 0x2000d4
Copyright (c) 1982, 1986, 1989, 1991, 1993
        The Regents of the University of California.  All rights reserved.
Copyright (c) 1995-2018 OpenBSD. All rights reserved.  https://www.OpenBSD.org
OpenBSD 6.4 (RAMDISK_CD) #916: Thu Oct 11 14:00:12 MDT 2018
    deraadt@i386.openbsd.org:/usr/src/sys/arch/i386/compile/RAMDISK_CD
Kernel boot messages omitted for simplicity
Welcome to the OpenBSD/i386 6.4 installation program.
(I)nstall, (U)pgrade, (A)utoinstall or (S)hell? fd0 at fdc0 drive 0: 1.44MB 80 cyl, 2 head, 18 sec
fd1 at fdc0 drive 1: density unknown
i
At any prompt except password prompts you can escape to a shell by
typing '!'. Default answers are shown in []'s and are selected by
pressing RETURN.  You can exit this program at any time by pressing
Control-C, but this can leave your system in an inconsistent state.
Terminal type? [vt220] <Enter>
System hostname? (short form, e.g. 'foo') delta
In this sections, we configure the network interfaces.
Available network interfaces are: fxp0 fxp1 fxp2 fxp3 fxp4 fxp5 vlan0.
Which network interface do you wish to configure? (or 'done') [fxp0]
IPv4 address for fxp0? (or 'dhcp' or 'none') [dhcp] <Enter>
fxp0: no lease.... got lease
fxp0: bound to 192.168.64.120 from 192.168.64.1 (64:6e:ea:45:4e:c2)
IPv6 address for fxp0? (or 'autoconf' or 'none') [none] <Enter>
Available network interfaces are: fxp0 fxp1 fxp2 fxp3 fxp4 fxp5 vlan0.
Which network interface do you wish to configure? (or 'done') [done] <Enter>
Using DNS domainname Home
Using DNS nameservers at 192.168.64.1
Here, we configure the password and login options
Password for root account? (will not echo) <enter the password>
Password for root account? (again) <repeat the password>
Start sshd(8) by default? [yes] <Enter>
Change the default console to com0? [yes] <Enter>
Available speeds are: 9600 19200 38400 57600 115200.
Which speed should com0 use? (or 'done') [9600] <Enter>
Setup a user? (enter a lower-case loginname, or 'no') [no] <Enter>
Since no user was setup, root logins via sshd(8) might be useful.
WARNING: root is targeted by password guessing attacks, pubkeys are safer.
Allow root ssh login? (yes, no, prohibit-password) [no] yes
What timezone are you in? ('?' for list) [Europe/Ljubljana] <Enter>
Available disks are: wd0 wd1.
Which disk is the root disk? ('?' for details) [wd0] ?
Here, we see two disks, wd0 being the CF card and wd1 being the actual HDD
wd0: STI Flash 7.4.0  (0.2G)
wd1: WDC WD1200BEVE-00WZT0  (111.8G)
Available disks are: wd0 wd1.
Which disk is the root disk? ('?' for details) [wd0] wd1
Disk: wd1       geometry: 14593/255/63 [234441648 Sectors]
Offset: 0       Signature: 0xAA55
            Starting         Ending         LBA Info:
 #: id      C   H   S -      C   H   S [       start:        size ]
-------------------------------------------------------------------------------
 0: 00      0   0   0 -      0   0   0 [           0:           0 ] unused
 1: 00      0   0   0 -      0   0   0 [           0:           0 ] unused
 2: 00      0   0   0 -      0   0   0 [           0:           0 ] unused
*3: A6      0   1   2 -  14592 254  63 [          64:   234436481 ] OpenBSD
I usually use the whole disk just to be sure.
Use (W)hole disk, use the (O)penBSD area or (E)dit the MBR? [OpenBSD] w
Setting OpenBSD MBR partition to whole wd1...done.
The auto-allocated layout for wd1 is:
#                size           offset  fstype [fsize bsize   cpg]
  a:          1024.0M               64  4.2BSD   2048 16384     1 # /
  b:           767.6M          2097216    swap
  c:        114473.5M                0  unused
  d:          4096.0M          3669184  4.2BSD   2048 16384     1 # /tmp
  e:          5119.1M         12057760  4.2BSD   2048 16384     1 # /var
  f:          2048.0M         22541696  4.2BSD   2048 16384     1 # /usr
  g:          1024.0M         26736000  4.2BSD   2048 16384     1 # /usr/X11R6
  h:         16667.3M         28833152  4.2BSD   2048 16384     1 # /usr/local
  i:          2048.0M         62967840  4.2BSD   2048 16384     1 # /usr/src
  j:          6144.0M         67162144  4.2BSD   2048 16384     1 # /usr/obj
  k:         75533.0M         79745056  4.2BSD   2048 16384     1 # /home
Use (A)uto layout, (E)dit auto layout, or create (C)ustom layout? [a] a
/dev/rwd1a: 1024.0MB in 2097152 sectors of 512 bytes
6 cylinder groups of 202.47MB, 12958 blocks, 25984 inodes each
/dev/rwd1k: 75533.0MB in 154691488 sectors of 512 bytes
374 cylinder groups of 202.47MB, 12958 blocks, 25984 inodes each
/dev/rwd1d: 4096.0MB in 8388576 sectors of 512 bytes
21 cylinder groups of 202.47MB, 12958 blocks, 25984 inodes each
/dev/rwd1f: 2048.0MB in 4194304 sectors of 512 bytes
11 cylinder groups of 202.47MB, 12958 blocks, 25984 inodes each
/dev/rwd1g: 1024.0MB in 2097152 sectors of 512 bytes
6 cylinder groups of 202.47MB, 12958 blocks, 25984 inodes each
/dev/rwd1h: 16667.3MB in 34134688 sectors of 512 bytes
83 cylinder groups of 202.47MB, 12958 blocks, 25984 inodes each
/dev/rwd1j: 6144.0MB in 12582912 sectors of 512 bytes
31 cylinder groups of 202.47MB, 12958 blocks, 25984 inodes each
/dev/rwd1i: 2048.0MB in 4194304 sectors of 512 bytes
11 cylinder groups of 202.47MB, 12958 blocks, 25984 inodes each
/dev/rwd1e: 5119.1MB in 10483936 sectors of 512 bytes
26 cylinder groups of 202.47MB, 12958 blocks, 25984 inodes each
Available disks are: wd0.
Which disk do you wish to initialize? (or 'done') [done]
/dev/wd1a (b6d12e2ee02e892e.a) on /mnt type ffs (rw, asynchronous, local)
/dev/wd1k (b6d12e2ee02e892e.k) on /mnt/home type ffs (rw, asynchronous, local, nodev, nosuid)
/dev/wd1d (b6d12e2ee02e892e.d) on /mnt/tmp type ffs (rw, asynchronous, local, nodev, nosuid)
/dev/wd1f (b6d12e2ee02e892e.f) on /mnt/usr type ffs (rw, asynchronous, local, nodev)
/dev/wd1g (b6d12e2ee02e892e.g) on /mnt/usr/X11R6 type ffs (rw, asynchronous, local, nodev)
/dev/wd1h (b6d12e2ee02e892e.h) on /mnt/usr/local type ffs (rw, asynchronous, local, nodev)
/dev/wd1j (b6d12e2ee02e892e.j) on /mnt/usr/obj type ffs (rw, asynchronous, local, nodev, nosuid)
/dev/wd1i (b6d12e2ee02e892e.i) on /mnt/usr/src type ffs (rw, asynchronous, local, nodev, nosuid)
/dev/wd1e (b6d12e2ee02e892e.e) on /mnt/var type ffs (rw, asynchronous, local, nodev, nosuid)
Let's install the sets!
Location of sets? (disk http or 'done') [http]
HTTP proxy URL? (e.g. 'http://proxy:8080', or 'none') [none]<Enter>
HTTP Server? (hostname, list#, 'done' or '?') [www.obsd.si] cdn.openbsd.org
Server directory? [pub/OpenBSD/6.4/i386] <Enter>
Select sets by entering a set name, a file name pattern or 'all'. De-select
sets by prepending a '-', e.g.: '-game*'. Selected sets are labelled '[X]'.
    [X] bsd           [X] comp64.tgz    [X] xbase64.tgz   [X] xserv64.tgz
    [X] bsd.rd        [X] man64.tgz     [X] xshare64.tgz
    [X] base64.tgz    [X] game64.tgz    [X] xfont64.tgz
Set name(s)? (or 'abort' or 'done') [done] <Enter>
At this point, the installation will start.
This may take a while, depending on your internet speed
Get/Verify SHA256.sig   100% |**************************|  1963       00:00
Signature Verified
Get/Verify bsd          100% |**************************| 12978 KB    00:05
Get/Verify bsd.rd       100% |**************************|  8571 KB    00:03
Get/Verify base64.tgz   100% |**************************|   152 MB    00:52
Get/Verify comp64.tgz   100% |**************************| 59013 KB    00:22
Get/Verify man64.tgz    100% |**************************|  7087 KB    00:03
Get/Verify game64.tgz   100% |**************************|  2628 KB    00:01
Get/Verify xbase64.tgz  100% |**************************| 16481 KB    00:06
Get/Verify xshare64.tgz 100% |**************************|  4432 KB    00:02
Get/Verify xfont64.tgz  100% |**************************| 39342 KB    00:13
Get/Verify xserv64.tgz  100% |**************************| 11573 KB    00:05
Installing bsd          100% |**************************| 12978 KB    00:01
Installing bsd.rd       100% |**************************|  8571 KB    00:00
Installing base64.tgz   100% |**************************|   152 MB    00:38
Extracting etc.tgz      100% |**************************|   259 KB    00:00
Installing comp64.tgz   100% |**************************| 59013 KB    00:21
Installing man64.tgz    100% |**************************|  7087 KB    00:04
Installing game64.tgz   100% |**************************|  2628 KB    00:00
Installing xbase64.tgz  100% |**************************| 16481 KB    00:05
Extracting xetc.tgz     100% |**************************|  6963       00:00
Installing xshare64.tgz 100% |**************************|  4432 KB    00:04
Installing xfont64.tgz  100% |**************************| 39342 KB    00:11
Installing xserv64.tgz  100% |**************************| 11573 KB    00:03
Location of sets? (disk http or 'done') [done] <Enter>
Saving configuration files... done.
Making all device nodes... done.
Relinking to create unique kernel... done.
CONGRATULATIONS! Your OpenBSD install has been successfully completed!
When you login to your new system the first time, please read your mail
using the 'mail' command.
Exit to (S)hell, (H)alt or (R)eboot? [reboot] h
syncing disks... done
The operating system has halted.
Please press any key to reboot.
When you reach this point, kill the power, reopen the IDS and remove the CF card, as we don’t need it anymore. Close the IDS up.
That’s it! The IDS is now a fully capable OpenBSD computer.
Caveats
Even though these IDSes are awesome, they have some caveats that can take a lot of your time trying to get around them.
- These machines have no ACPI, and as a consequence, have no power management. They can’t shut down from software and they can’t do Wake on LAN, obviously. A graceful shutdown is performed by halting the machine, and then turning the power switch off.
- The PCI bus has problems with interrupt allocation, making it impossible to use both of the expansion slots. I am not too familiar with device drivers in OpenBSD, but the issue is probably solvable. If anyone knows how to troubleshoot such problems, please contact me and I will update this guide.
Additional improvements…
- It is possible to upgrade the RAM, HDD, and even the CPU, just make sure that the power consumption stays under 50W.
- I swapped the 4-interface Fast Ethernet card for a gigabit one. You can put any PCI card inside this machine, however, only one of the slots will ever work (at least for now, see caveats)
- If preferred, OpenBSD can be installed on a (bigger) CF card to give the machine a speed boost. Instead, the HDD must be used as the installation drive, and the CF card as the target. However, I found out that the speed boost is pretty minuscule and simply isn’t worth the time to set up.
- BIOS can be entered by Control-C, and Cisco Rommon can be entered with Control-D
Leave a Reply to rozmannik Cancel reply