Firewalls aren’t as special as they’re made out to be in the business sphere. Sometimes salesmen will try to convince you otherwise, claiming their network appliances use application specific hardware, but teardowns often disappoint. This teardown of the IBM Proventia GX4004 is no different, as the firewall appliance turns out to be a very ordinary Pentium 4 computer.
Teardown
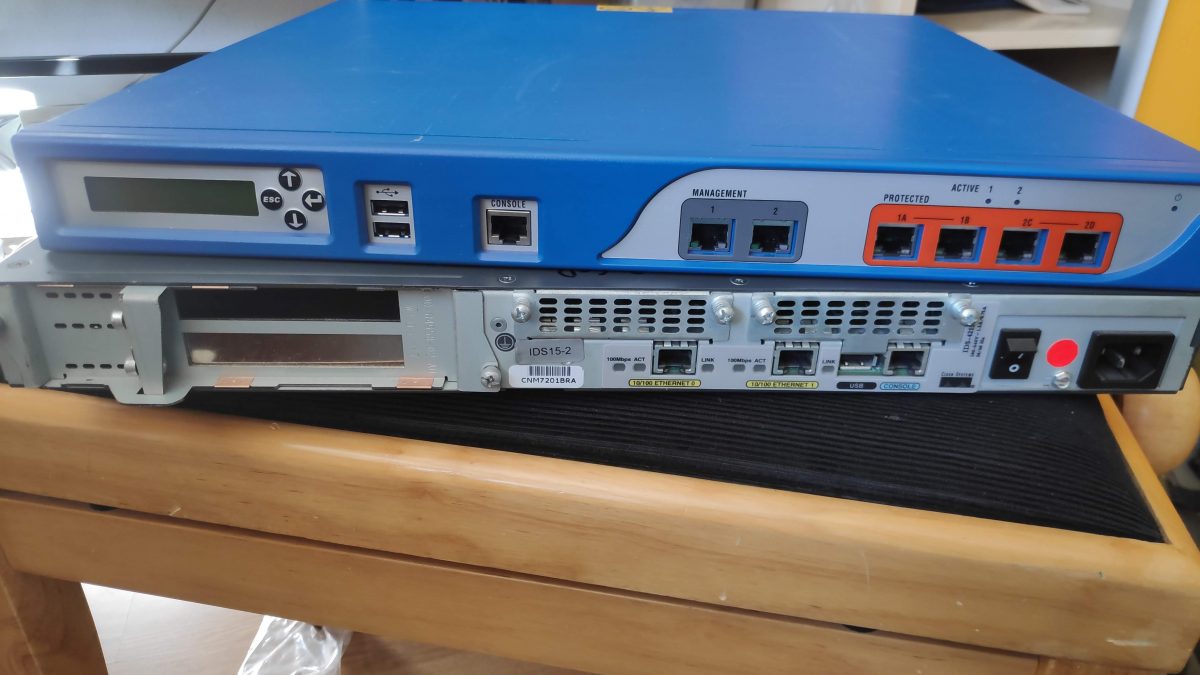
Let’s start at the firewall’s appearance: it’s a beautiful piece of hardware. The blue-silver-orange color palette looks really good. Seriously, that front panel should be in an industrial design textbook. I’ve placed my Cisco IDS-4215 underneath for scale. The Proventia is substantially bigger and heavier than the Cisco, but considering the difference in hardware that’s easy to justify.

The front plate sports a decent amount of I/O: two management Ethernet ports, 2 pairs of protected Ethernet ports, two USB 2.0 ports and a standard RJ45 console port. There’s also an EZIO-100 LCD display unit on the left side of the panel.

At the back we are greeted by a standard FlexATX power supply, multiple fan vents, and a single full-height PCI slot.
After removing some screws on the back, right, and left side, the blue cover slides off, and we’re greeted with a slightly underwhelming server board. For a sixteen-thousand-dollar appliance, I was hoping to see special proprietary hardware inside, but I seem to be out of luck here. Oh well, let’s explore a bit!

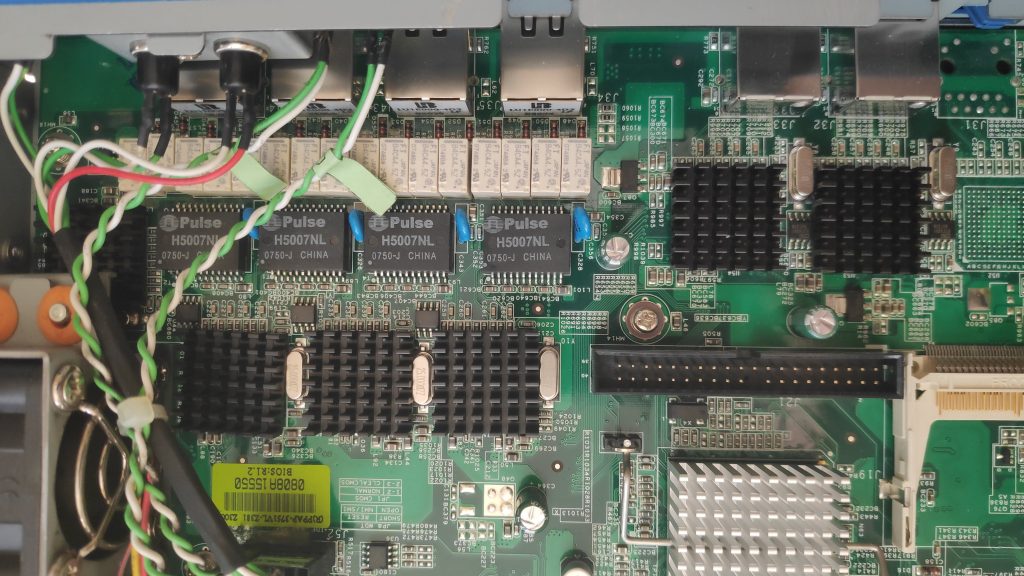
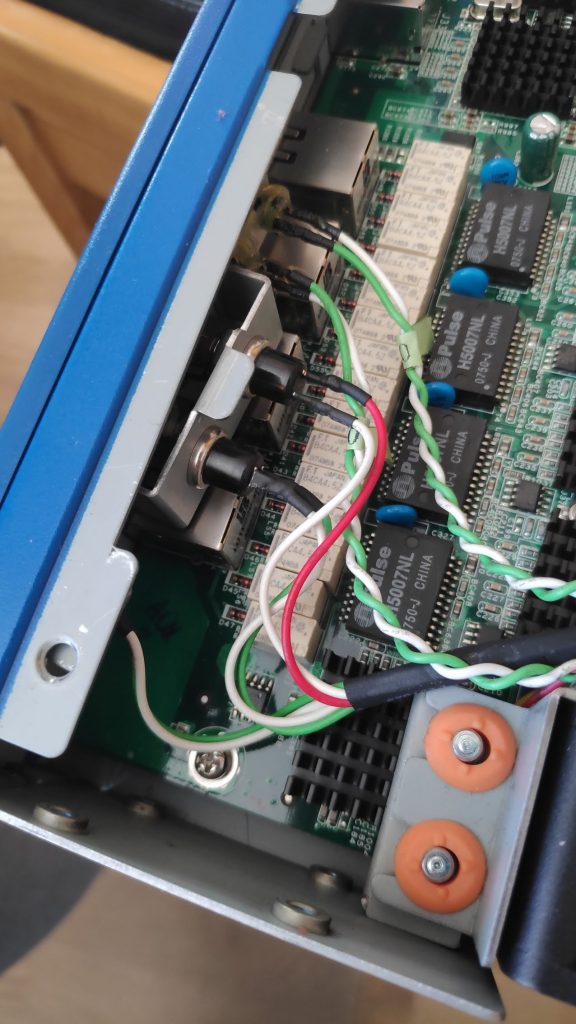
The network controllers are located in the top left corner. The two on the right belong to the management interfaces and are quite unremarkable. The remaining four controllers are a bit more interesting. Every network controller has 4 relays, a relay for each Ethernet pair. The relays are there to bypass the network interfaces entirely in case the machine hangs or loses power. The security of such a system is of course questionable, but sometimes uptime means more than security.
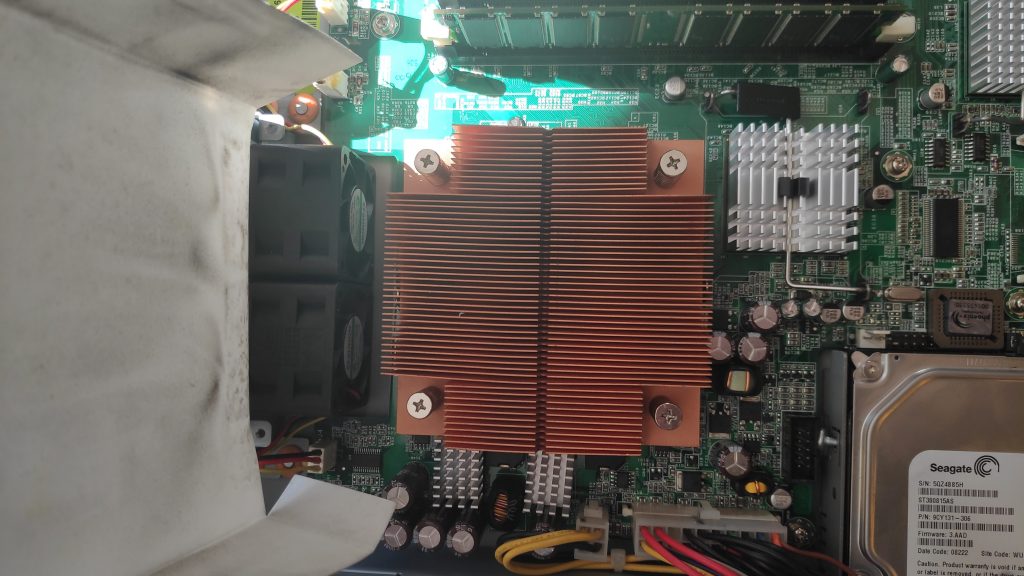
Storage is plentiful: there’s 2 SATA connectors, 1 IDE connector, a CF card slot and a combined SATA+POWER connector available. Only the combined connector is occupied by default, connecting to a Seagate 80GB hard drive housed in a drive tray.
There’s a pretty substantial bank of jumpers next to the CF slot. Not all jumpers are documented, but I managed to figure out that JP7 is the one you want to move, should you run a third-party OS. Moving JP7 jumpers to the left disables software control of the bypass relays, enabling normal network interface behaviour. Nevertheless, because of the way those relays are wired, there’s no way to disable the bypass once the machine is powered off.
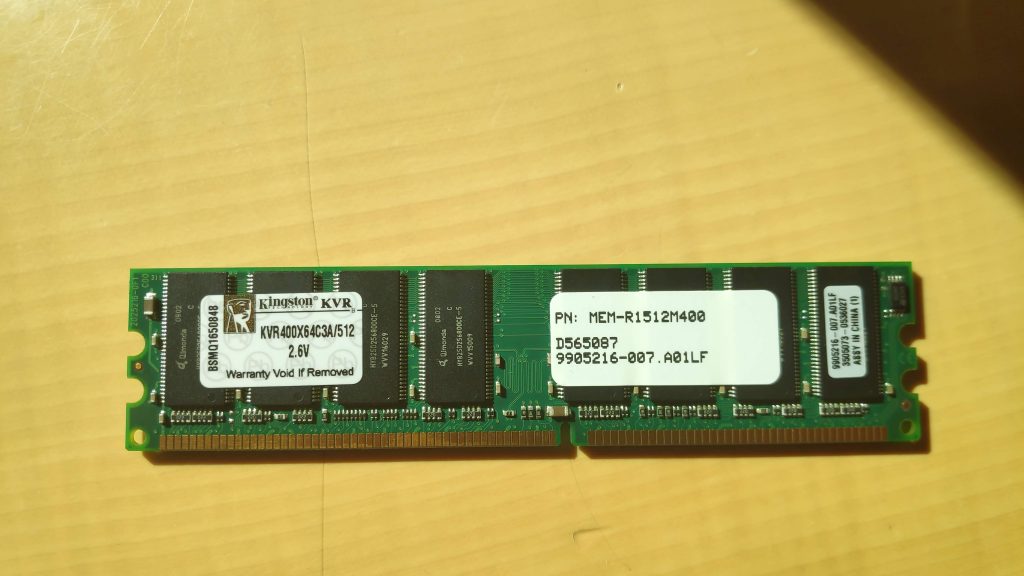
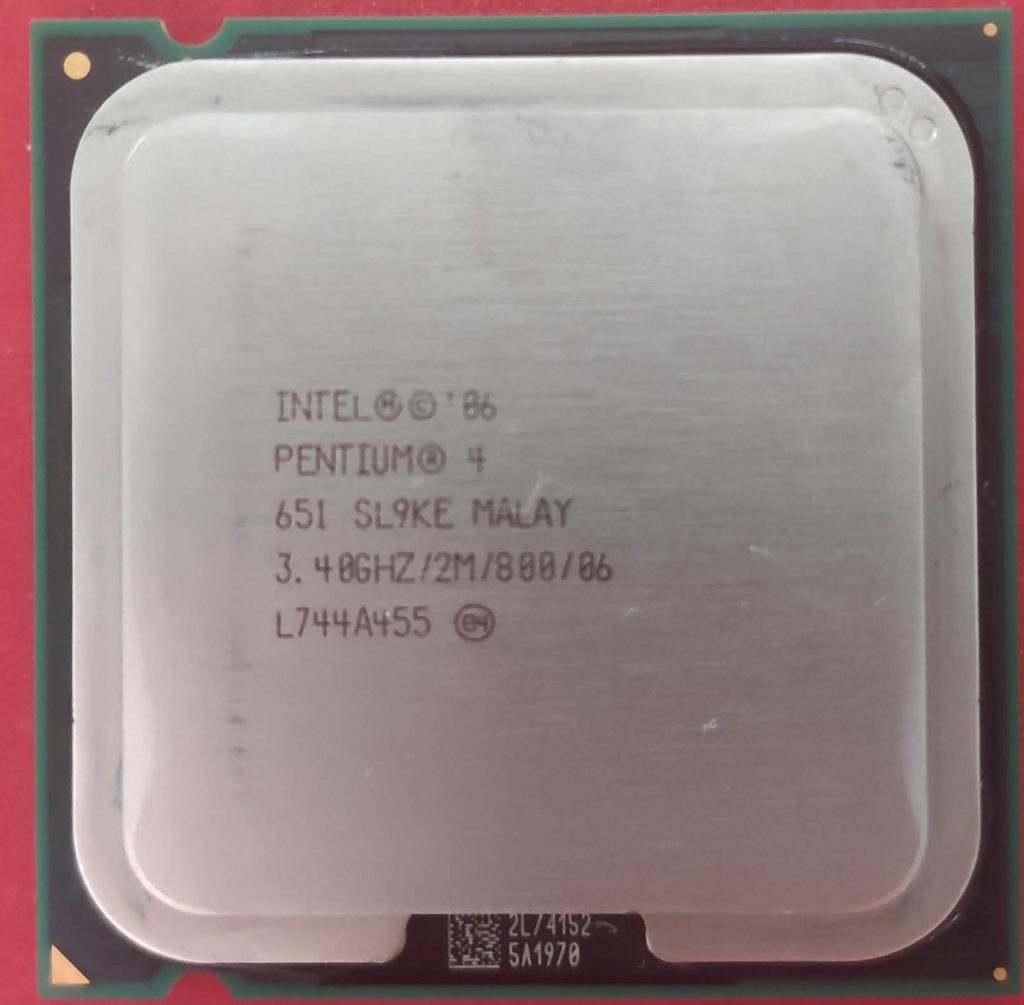
Under the plastic shroud there is a pretty big copper heatsink that cools a Cedar Mill Pentium 4 HT 651 CPU. This is no entry-level processor: with 3.40 GHz it has a higher base clock than some current CPUs. It’s really a shame that it’s bottlenecked by slow DDR-400 RAM.
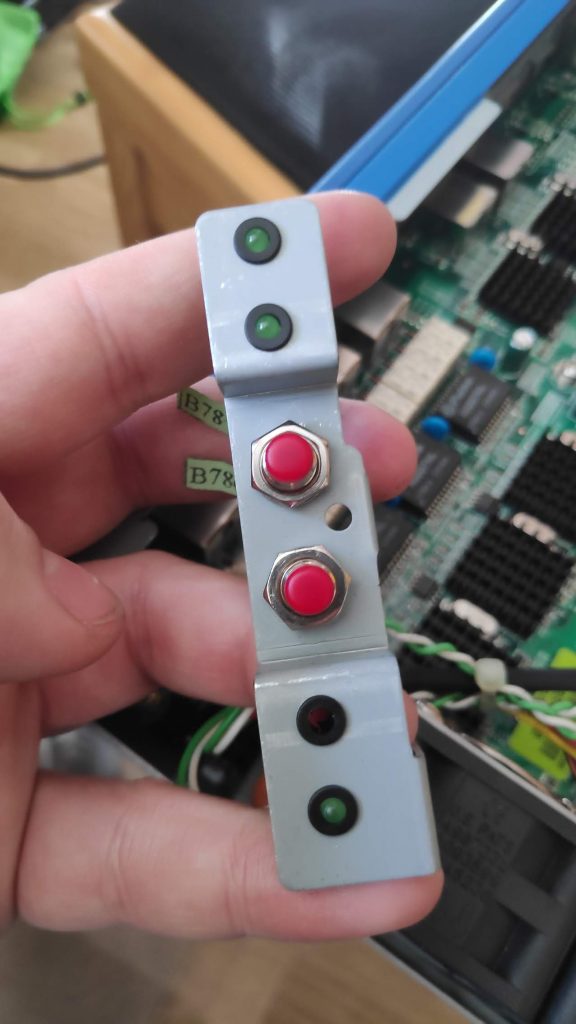
Front panel LEDs are housed above the network interfaces. If you remove the housing from the main chassis, you’ll discover an easter egg – hidden reset and power buttons.
The 250W power supply has a standard 20-pin ATX connector, along with a 4 pin CPU connector and a Molex that is unused.
Powering up
Enough talking about the hardware. Let’s power it up and see what gives. Setting the console to 9600 baud reveals a straightforward boot screen. This seems to be a custom BIOS that uses a serial console, but is normal otherwise. Here is the POST sequence:

We can get into the BIOS by pressing TAB at POST check:

Wow, this is pretty well-executed, with arrow keys working and all! The BIOS is fully featured, the only downside is the slow 9600 baud serial line that takes about two seconds to render the terminal screen. Anyway, I found out that the defaults work well for me, so tweaking is to taste. There are also some BIOS settings talking about LAN bypass, but they didn’t seem to do anything, so just left them on defaults.

OpenBSD
Getting OpenBSD installed on this thing wasn’t too easy. USB wouldn’t boot and neither would the CF card. Something strange has been going on between old machines and OpenBSD install.fs images for a while now, and I was not in the mood for figuring out why the damned thing froze trying to boot the install kernel. Thankfully, the Press L to Boot From LAN prompt opened up an option to ditch local boot media altogether and install over PXE.

For my bootserver, I used my converted Cisco IDS-4215. I’d been using it to boot diskless clients, so it had everything I needed for PXE already installed: a working router, DHCP and DNS servers and a TFTP server with a recent bsd.rd kernel. Sure enough, PXE booted the installer first time.

The installation finished effortlesly, and in fifteen minutes I had a pretty capable OpenBSD firewall ready.

Conclusion
Even though the GX4004 isn’t as special as it lead on to be, it’s still more than good enough to install your firewall or server OS of choice on. If you need a cheap networking device, the GX4004 paired with the correct software certainly won’t disappoint.
Leave a Reply